Grain Free Tortillas

IMG_6195

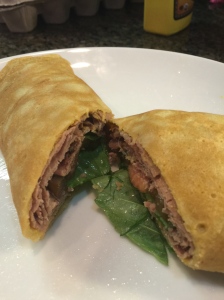
Yes, I’ve been MIA again.  Life just seems to get busier every year.  I’ll spare you the details for now but I just wanted to share something I thought was so exciting.  Grain free tortillas!  I’ve made versions of this with coconut flour but coconut flour has a very distinctive flavor that I like in baked goods but not much else.  These tortillas are soft, elastic and pliable with a neutral flavor.   Aren’t tortillas really about what you are eating them with??  These stayed together, didn’t get soggy and weren’t grainy.  Can you tell I’ve tried several different versions?  I’ve been doing a lot of reading about gut health, our microbiota and  increasing dietary fiber.  I’m certainly guilty of not having anywhere near enough soluble or insoluble fiber in my diet for years and years on end.  And I’ve paid the price.  So in my quest to rectify that I’ve been trying out new foods to work with.  Plantains were on that list.  Plantains have about 57 grams of carbohydrate for a medium green one.  Yes, that’s a lot but I’ve never come close to eating a whole one in one sitting anyway.  Of those carbs 4 grams are resistant starch.  Resistant starch is a type of dietary fiber that we are unable to digest.  It travels down to our large intestine where our bacterial army does it’s magic.  That starch/fiber is what our gut bacteria feed on.  If we don’t feed our micro flora they don’t tend to stick around and proliferate.  We can take probiotics but unless we feed them they are transient and temporary.  Why is our gut bacteria important?  Well, It’s what keeps us healthy.  80% of our immune system is in our guts.  It drives our metabolism and those bacteria are the producers of butyrate.  Butyrate is a byproduct or waste product of our bacteria feeding on the resistant starch.  That butyrate is used by our bodies as energy.  It is also a powerful inflammatory in our guts, it helps decrease gut permeability and because that starch isn’t digestible by us but by our bacteria there is no spike in our blood sugar.  Actually, resistant starch improves insulin sensitivity and reduces blood sugar. Amazingly, it has a “second meal effect” meaning that it helps control your blood sugar for the following meal as well as the meal in which it was consumed. Resistant starch is associated with a decreased risk of colon cancer and may help with weight loss due to its ability to decrease blood sugar spikes post meal.  It may help decrease appetite and help to maintain lean muscle mass.

Anyway, back to the recipe.  These are the reasons I am excited to find a way to enjoy plantain.  Now to the recipe.  This was super fast and easy.  You will need a high powered blender and a large nonstick pan.

Ingredients:

1 green plantain

2 eggs

2-3 T milk or water

pinch of sea salt

coconut oil for the pan

IMG_6192

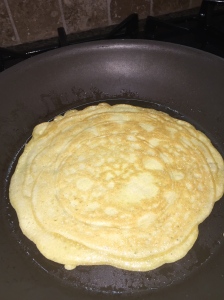
Peel and slice the plantain.  Add it and the eggs and salt to the blender.  Blend until smooth. Add just enough milk to thin out the batter so that you can pour out the batter into a thin layer.  Water may work just as well if you are dairy free.  Heat pan and enough coconut oil to lightly cover the bottom.  Pour about 1/4 cup of batter into the hot pan and swirl the pan or use the back side of a spoon to spread the batter into and 8-10 inch round.  Cook on medium heat until the bottom side is lightly browned and then flip to brown the top side.  When finished lay it on a plate covered with a paper towel.  Repeat for the rest of the batter stacking them on top of each other with paper towel in between.  These were great warm with a little butter (has to be Kerrygold!) or dipped into olive oil.  I added some Italian seasoning to one batch and it was great.  Next time I will try some herbs de provence.  Cumin and coriander might be good too.  When they are completely cooled the paper towels can be removed and these can be stored, covered in the fridge.  Warm slightly in the microwave for a few seconds to enjoy them later.  They are just as soft, elastic and pliable the next day.
Almond Flax Crackers

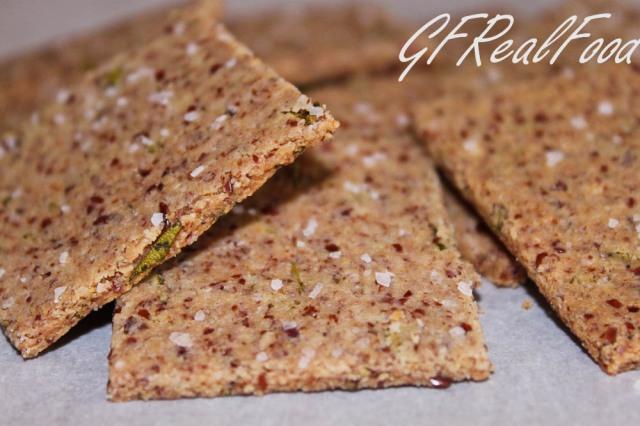
Almond Flax CrackersI miss crackers. Sometimes you just need something crunchy and something to dip that is still grain free. I have made almond flour crackers before but I used my own homemade almond flour. They tasted great but they broke easily and were very tender, almost soft. I think that had something to do with the fat content in it. This time around they were perfect as I used store bought almond flour. They were super quick and easy to make and were crunchy, not soft or crumbly. I ate them with my homemade chicken liver pate and they were exactly what I was craving. Here is what I did.

Almond Flax Crackers

2 cups blanched almond flour (I used Honeyville Blanched Almond Flour)

1/4 cup ground flax meal

1-2 T finely chopped fresh rosemary

1 egg white

sea salt and pepper to taste

Preheat oven to 325. Mix everything together with your hands. If the dough is a bit dry and won’t quite hold together you can add 1 tsp of water at a time until it just holds together. When everything is well mixed and the dough sticks together transfer it in a ball onto a piece of parchment paper. Press the dough down to flatten it a bit then cover with a second piece of parchment paper and roll the dough out until it is uniformly to the desired thickness. If the sides crack apart just push them back together a bit. Carefully transfer the rolled cracker onto a large cookie sheet. The flattened dough should take up most of the sheet. Score with pizza cutter into small squares. Sprinkle the tops of the crackers with a coarse sea salt. Bake for 20 minutes. Check for light browning the crackers. If they are not browning yet bake in 5 minute increments until they are. If they are not baked enough they turn out a bit soft. If they are too brown they don’t taste as good. When they are done leave them on the cookie sheet to cool completely. They firm up and become crispy once they are cool. When cool break them apart and store in an airtight container.

Chocolate Chip Scones (Almond Flour)

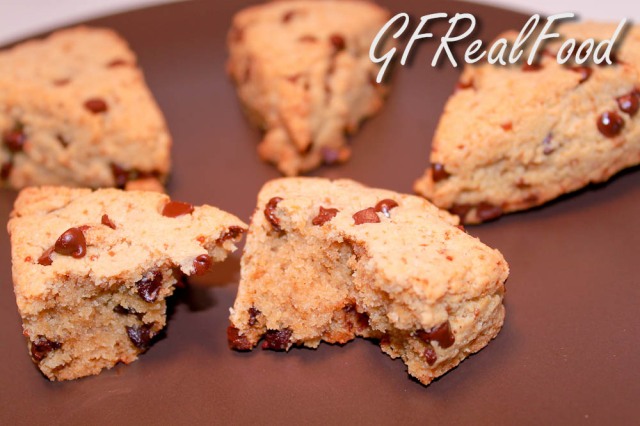
Chocolate Chip Scones, GFDFIt has been freakishly cold here today as it has in the rest of the country. When it is miserable outside I get this need to bake. It’s the only thing I want to be doing. Last week I ordered, for the first time, from Honeyville. I ordered blanched almond flour. I really needed to see if it was a whole lot better than the almond flour that I make. I thought it was going to be more expensive than it was. There is very little convenience in my kitchen so it is nice to be able to have the almond flour ready. Is it better than mine? It depends on what I’m making. If I were making chocolate chip cookies or my Almond Coconut Cookies I would certainly use my own almond flour. I like the slightly coarser texture. The Honeyville Blanched Almond flour is really fine and powdery as well as lighter in color. I made these Cinnamon Bun Muffins yesterday and they were fabulous. I, of course, used coconut oil in place of the grapeseed oil and used coconut sugar and less of it in place of agave. The muffins were very light in texture. The recipe made 8 muffins and they were all gone in a matter of 2 hours. I now need to figure out a bread recipe that uses almond flour. Anyway, back to the chocolate chip scones. I wanted something today that was only slightly sweet. I think the next time I make these I will use only 1 T of coconut sugar. The sweetness of the chocolate chips should be enough. This recipe made 8 scones and they were absolutely perfect with a cup of green tea on this “cold” Arizona day. These are gluten free, grain free and dairy free. If you could save a couple of these for the following morning they would make a great breakfast. See mom, here is another breakfast without toast! 😉

Chocolate Chip Scones

1 1/4 cup blanched almond flour

2 T granulated coconut sugar

1/4 tsp baking soda

1/4 tsp (I used slightly more) sea salt

1 egg

3 T melted coconut oil

1/4 cup Enjoy Life Mini Chocolate Chips

Preheat oven to 350. Line baking sheet with parchment paper. In medium bowl combine first 4 ingredients. Add melted coconut oil and lightly beaten egg. Mix well with a fork. Fold in chocolate chips. Transfer dough to parchment lined baking sheet and form a ball. Press ball down until it is about 1 1/2 thick or about 8 inches in diameter. Cut into 6wedges. Separate the slices evenly on the sheet. Bake for approximately 15 minutes or until the edges are starting to brown slightly and the centers are firm to touch. Let cool to room temperature and serve.

Brioche (Gluten and Dairy Free)


Heavenly Brioche
Heavenly GFCF Brioche

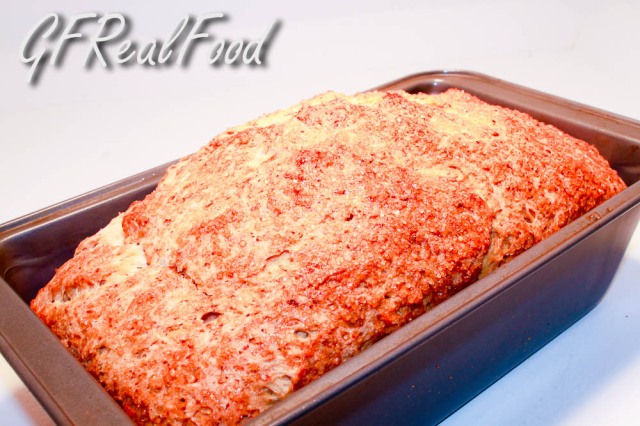
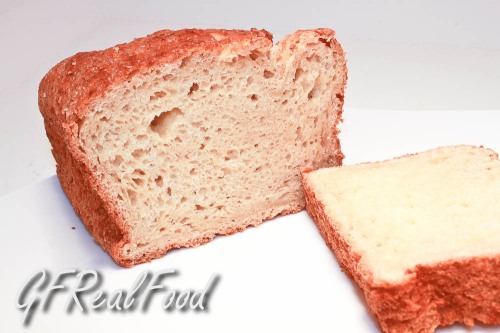
Have you ever come across one of those recipes that at first glance it instantly makes you drool and crave?  Then the feeling of such intense need overcomes you that you completely forget about your diet or promise to yourself to eliminate sugar and grain?  Well this is what happened to me yesterday, at 5pm, while I should have been making dinner.  I found this recipe quite accidentally.  I certainly wasn’t looking for a Brioche recipe but there it was and I had to make it – right then.  The original recipe comes from The Culinary Life.  It looks like she got the recipe from a cookbook called Healthy Bread in Five Minutes a Day.  How this particular bread could be deemed healthy is beyond me but I’m not going to worry about that today because this bread is OUTSTANDING.  We all need a little treat sometimes, right?  Anyway, the original recipe was not dairy free.  It also contained brown rice flour which I have never purchased before so I had to make several changes to the recipe to suit our needs.  The result was surprisingly light, moist, sweet and flavorful.  It looks like and smells like wheat bread.  Best yet it has the texture of wheat bread.  It is soft, fluffy, tender and elastic.  The original recipe made 3 loaves and the directions explained how to make the dough and store it in the fridge so you could have 3 fresh loaves days apart.  I purposely made enough for only one loaf.  This stuff would be dangerous to keep around the house.  Here is what I did with the recipe.

Brioche – Gluten and Dairy Free

1/3 cup teff flour

1/3 tapioca flour

1 1/3 cup corn starch

2 tsp dry active yeast

1 tsp sea salt

2 tsp xanthan gum

1/2 cup water

1/2 cup canned coconut milk

2 small eggs

1/3 cup honey

1/3 cup melted coconut oil (I used expeller pressed)

1 tsp vanilla

raw sugar for sprinkling on top

melted coconut oil for greasing pan and for handling the dough

Mix the dry ingredients together in a bowl.  In the bowl of a stand mixer combine wet ingredients.  Add dry into wet and mix until there are no lumps of dry flour.  Scrape down sides of bowl a couple of times during mixing.  Using a spatula, form dough into a ball in the bottom of the bowl.  Cover mixer bowl with a clean dish towel and let it rest and rise at room temperature for 2 hours.  Meanwhile prepare a nonstick loaf tin (8.5 x 4.5 inch) by greasing with coconut oil.  After the 2 hours, liberally coat your hands with melted coconut oil and form dough into a ball with your hands.  Transfer dough into loaf pan and gently shape and smooth the loaf to fit the pan.  Smooth the top of the loaf (something I could have done better).  At this point I sprinkled some raw sugar on top and allowed the loaf to rise for another 40 minutes.  Preheat oven to 350.  Bake for 40-45 minutes until the top is a caramel brown and is firm to the touch.  After cooling a bit remove it from the pan.  Now here is the really difficult part, the part in which I failed: let the loaf cool before slicing and eating.  Hope you have better luck than I did.  Because I was impatient, I compressed the loaf a bit during the slicing.  It would have appeared fluffier had I waited.  I didn’t care, it tasted great. 

 GFCF Brioche

Since I finished this loaf just before 9pm I refrained from eating more than one slice which took an enormous amount of willpower.  In the morning this Brioche became amazing french toast.  The recipe for that is coming soon!

If this recipe is up your alley go check out The Culinary Life.  She has some amazing looking recipes.  The next time I have a blow it day I am going to try her Brioche Cinnamon Rolls.  They look amazing.

Sweet Potato Muffins (Coconut Flour)

I accidentally made way too many baked sweet potatoes the other night. Now I have to try to find a use for them. Muffins of course are in order. These were great. They are not typical muffins in that they are only subtly sweet. They are not like the muffins you would buy in the stores that are really cake. They are soft, moist and tender. They are grain, gluten, sugar and dairy free. For a muffin, they are really low carb. I loved them both warm out of the oven or a day later smeared with virgin coconut oil. The kids liked them with butter and a little honey. These made a great breakfast or snack.

Sweet Potato Muffins (Coconut Flour)

1/4 cup sifted coconut flour

1/4 tsp baking soda

1/4 tsp sea salt

1/2 tsp ground ginger

1/2 tsp cinnamon

1/4 tsp ground cloves

1/4 tsp nutmeg

3 eggs

2 tsp vanilla

2 T coconut oil

2 T coconut milk

3/4 cup roasted mashed sweet potato

1 T maple syrup **optional**

1/2 cup chopped pecans (reserve some halves for the tops)

Preheat oven to 400 degrees. Line 7 regular sized muffin cups. Mix all dry ingredients in one bowl (except for the nuts). Mix all wet ingredients in a separate bowl. Pour dry into wet and mix well. Fold in nuts. Divide evenly into muffin tins and decorate with reserved pecan halves. Bake for 20 minutes at 400 degrees. **I did not use the maple syrup but think at would really complement them if you are okay with the added carbs.**

This recipe has been entered in Real Food Weekly Jan 20/11 over at The Whole Gang.

How To Make Your Own Almond Flour

Can anyone tell me what makes a man tick?  Because I am at a loss.  My husband whom I think is (usually) a genius leaves me scratching my  head.  Why?  Let me tell you how my day started.  We have 2 of iPod touches, the ones that have Face to Face which is video calling.  First just let me say that I hate the idea of video calling.  I don’t want to be bothered worrying about how I look just to make a phone call.  It’s great for the kids and Grandma and for the kids and my husband or I while at work.  However it’s not great when the iPod rings at 5:20 am because my husband, who was at work, thought I would be awake and he wanted to demonstrate to a male co-worker how the thing worked.  Seriously?!  I ignored the call and tried to go back to sleep.  Then he called back at 6:30.  I had just woke up and was barely upright or even thinking yet.  I answer the call and while waiting to connect see myself on the screen and ponder what has become of me.  Can you now imagine how mortified I am when the call connects and there is Ron’s co-worker staring back at me.  Seriously, what was my husband thinking?!  Now I know better than to show my face when I answer a call.      

One of my favorite blogs is Elana’s Pantry.  Nearly everything this woman posts looks great.  For me the problem is that she uses a lot of almond flour.  I love almond flour, just not the price.  She recommends one particular brand, Honeyville Blanched Almond Flour.  While I’m sure it is a great product, I just can’t see myself spending that kind of money on flour.  As I have said before on this blog, we grind a lot of our own flours.  We grind amaranth, millet, buckwheat, quinoa, rice and corn.  We save a TON of  money doing it this way.  Since I am leaning toward a grain free diet lately it got me wondering if I could make my own almond flour.   Turns out that yes, I can.  It’s quick and easy.  I have used this almond flour for cookies, muffins and pancakes.  So far everything I have tried with it has worked out great.  I have never purchased almond flour so I guess I have nothing to compare mine too but I expect that mine is moister so I need to use a bit less oil in whatever recipe I am using if the recipe calls for commercial almond flour.  The only things you need to make this is a coffee grinder (preferably not one that you use coffee beans for) and a wire mesh sieve.   

Here’s how I do it.  

Larger Pieces Sifted Out

Add 1/3 to 1/2 cup of whole raw almonds to the coffee grinder.  Grind until you have a fine meal.  When you hear the grinder make a different noise and the almond meal inside is not moving well anymore, stop.  If you continue you will be making chunky almond butter.  Pour the almond meal into a sieve which is sitting in a large bowl.  Shake out the almond flour into the bowl.  The larger meal and some bigger pieces will be left over.  Just leave them in the bowl for now and repeat the process until you have the amount you need.  Then add back into the grinder all those small pieces and the courser meal and grind again.   

Closer Look

This slideshow requires JavaScript.

I must get at my day now.  The kids found the small head of a salamander in the living room this morning.  I have got to locate the rest of him.  Yup, that’s desert life!

Pizza Crust

Cheesy GF Pizza

Since going gluten free do you miss great pizza?  Is making pizza at home dependant on whether or not you have a mix in the cupboard?  Do you hate the rise time needed for yeast based crusts?  If you can relate, I have got the answer for you.  This is my pizza crust recipe.  It’s super quick to put together, requires no yeast and so therefore no rise time.  It doesn’t have that gluten free bread texture (if you’ve ever bought gf bread you know what I am talking about)  and I am betting that if you do any gf baking at home you already have all the ingredients in your pantry.  Oh and did I mention that it is AWESOME!?  A word of warning: if you like cheese you are going to LOVE this and it is really hard to have just one piece.  We occasionally go out for pizza and while it is nice to eat out sometimes, it is really expensive.  Just yesterday we celebrated my daughters 4th birthday and the bill at the pizza restaurant was $74 for just the 5 of us.  YIKES!!  Even when we splurge and eat out I hear at least once from someone who says the pizza we make at home is much better.   I have to agree.  It is much better!  The last couple of times we made this we made 4 or 5 batches at once (maybe more, I can’t remember).  I put Ron to work doing the mixing and the rolling while I measured and cleaned.  We ended up with 18 pizza crusts to freeze.  When we want pizza we pull a couple of these out, add the sauce and toppings and bake.  They are ready to eat in less time than it would have taken to order in if we had that option – which we do not.   

Cheesy GF Pizza Crust (yeast free)

1 cup tapioca flour

1 cup white rice flour

4 cups grated mozzarella cheese (room temperature – helps with mixing)

2 tsp baking powder

2 eggs

1 tsp salt

1-2 tsp italian seasoning or fresh chopped rosemary

Pre heat oven to 350 degrees.  Combine all ingredients in a really big bowl.  Mix dough with your hands until the cheese shreds are no longer visible and you have a cohesive dough.  If it seems too wet you can add a bit more tapioca flour until you get a smooth dough ball.  Divide dough into large orange sized balls.  To roll out you can either flour your counter with tapioca flour or rice flour or you can roll it out between two pieces of parchment paper, which I think is easiest.  We generally make crusts sized 6-10 inches across.  Roll them out until they are a bit thicker than a pie shell.   I can’t say how it will turn out if you make it much bigger than that.  Transfer crusts onto baking pans.  You can leave the parchment paper underneath and save yourself the washing of a cheese crusted baking sheet.  Bake for about 10 minutes or until the edges start to brown (the center will not be completely baked).  When they are at this point you can do one of two things.  You can add your sauce or olive oil and toppings and put it back in the oven, still at 350, until the center is hot and bubbly, maybe another 10-15 minutes.  Or you can let them cool and then freeze them in ziplock bags.  We make the crusts small enough to fit into the large ziplock bags.  Then when you need a quick lunch or dinner you can just pull out a couple of pizza crusts, top them and put them in the oven at 350 for 15 minutes or so.  Again, it’s done when the center is hot and bubbly.

I’m Famous For My Bread, AGAIN!

Okay, that may be overstating the case a tad.  I wrote a while ago about how a friend of mine, Stephanie, entered my bread recipe in a gluten free baking contest.  She has CD as does 2 of her 3 kids.  Her only sibling and her father also have it.  Stephanie’s  sister, Kristen, is a dietician.  She was on TV this morning on a local morning news program in Nebraska.  She spoke about CD, symptoms, diagnosis, testing and it’s impact if it goes undiagnosed.  I thought she did an amazing job.  It’s hard to do those kind of interviews and say everything you would like to get said.  I think she did a great job at explaining it and why it is important to get tested.  Here are the links to the clips.  Right at the very beginning she talks about my bread recipe and how it came to be.  In the second clip she shares the bread she made and brought with her to the set.  It of course got great reviews from the hosts.  (The program also left a link to the recipe.  Unfortunately, they called it gluten free whole wheat bread instead of whole grain bread.  I am sure they will fix that since there is no such thing as gluten free wheat.)  There was also a link to my blog at the end.  Pretty cool, hey?!  As I have said before. I am not trying to make money from my blog or my recipe.  I just think it is a great thing to be able to share something with people who need it.  Mostly though, I am incredibly happy to see that Celiac Disease is getting more and more press.  One in 100-133 people have CD.  97% of those people don’t know they have it.  Only 1 in 6 people with CD have symptoms even though their small intestine is being destroyed.  If you have a blood relative with CD there is a 1 in 22 chance you have it.  (I think that statistic is WAY off.  I would bet the number is closer to 1 in 2)  If you have any auto immune disease, such as CD, you are more likely to have another, especially if you continue to eat gluten.  Many doctors still think that it is a rare childhood disorder.  Getting screened is as easy as one little poke!  CD often goes hand in hand with ASD (autism spectrum disorders), Type I Diabetes, IBS, depression to name a few. 

Thanks again to Stephanie and Kristen (and their mom for starting this whole TV thing) for doing such a great job of bringing awareness to CD and to my bread recipe.   You guys are awesome!

 Once again here is the original recipe.   And here is the simplified version.

Gluten Free Cheesy Hamburger Buns


Cheesy GF Hamburger Buns


The hardest thing about eating gluten free is the bread.  There is no doubt about that.  It’s not just the sandwich bread but the hamburger buns and hot dog buns.  I’ve bought Kinnikinnick hamburger buns to take to a family BBQ so that the kid’s meal would look just like everyone elses.  The buns however were more than a dollar a piece and were dry and brittle.  Dry, as in, get stuck in your throat.  They were terribly dry and mealy.  We all ended up pushing the buns to the sides of our plates and eating our burgers without the buns.  I have got the gf bread thing figured out and I am sure that my regular bread recipe would make great buns.  However, that recipe is yeast based and would require rise time and more work than I am usually up for on burger night.  I also have an amazing recipe for cheese buns which are a soft and delicate, decadent dinner roll.  We had been missing hamburger buns.  Burgers without a bun just aren’t the same.  I have to give credit to my husband for this idea.  He suggested using the cheesy dinner rolls as hamburger buns.  The recipe as it was wouldn’t be sturdy enough to hold a hamburger and all the toppings so I made some adjustments.  They turned out to be fantastic.  However, if you don’t love cheese, move along.  You won’t like these hamburger buns if you don’t love cheese.  They are moist, tender, cheesy, and flavorful.   Best yet, for me anyway, was the ease of preparation.  No yeast means no wait.  Just mix it all up, divide, roll into balls and bake.  These are so good if I were to be able to choose between these and a wheat bun, I would choose these cheese buns.    

Cheesy Hamburger Buns   

1 cup tapioca flour    

1 cup white rice flour    

4 cups grated mozzarella cheese    

2 tsp baking powder    

1 tsp salt    

2 eggs    


Preheat oven to 350 degrees.  Grate cheese and leave it out to come to room temperature.  (I do not use the pre-grated cheese and I am not sure it would work as well.  The blocks of mozzarella is what I use and find it to mix well and turn creamy very easily with just the warmth of your hands.)  Add the remaining ingredients and mix well with your hands.  Work it until it turns into a soft dough, the cheese shreds are not visible and you have one cohesive dough.  This only takes 3-5 minutes (but I live in the Arizona desert so it might take longer if you are in a colder climate)  To divide the dough into 6 equal parts I divide the dough into 2 equal pieces.  Then divide those into 3 equal pieces.  Roll into uniform balls and put each ball into the cup of an ungreased oversized muffin tin.  Bake for 25 minutes until the edges start to brown.  Serve these cheesy buns hot.  In the unlikely event you have leftovers they do reheat very well with a few seconds in the microwave.  Enjoy.  You can thank me later!  😉    

Burger Better Than Wheat

Teff “Cornbread”

Teff "Cornbread"

I love cornbread.  The slightly sweet variety is my favorite.  However, everytime I make it I feel sort of giulty about it.  So I have come up with a slightly healthier version.  It tastes nearly the same and even has the same texture.  It is made nearly corn free with the exception of some baking powder which has corn starch in it and xanthan gum which is made from corn.  Why no corn anyway?  Nutritionally speaking corn is more of a grain than a vegetable.  It doesn’t have a lot to offer to your body.  It is high in carbs and it is in nearly every processed food.  You really don’t need anymore.  Then this week I ran across this.  It wouldn’t surprise me if later studies prove this to be true.  It’s true that I am not pandering to the general population with this recipe since most people have never heard of teff and who on earth even has teff seeds in their pantry ~ who but me?   Teff is an amazing grain.  It is my favorite gluten free grain.  It has a mild flavor that reminds me of wheat.  You can buy ivory teff flour or dark teff flour and teff seeds.  The seeds are really tiny, smaller than a poppy seed.  I buy all three directly from the supplier who sells to Bob’s Red Mill.  I buy 25 lbs at a time and it is always used.  The best reason though to use teff in place of corn is its nutritional profile.  Teff is high in protein, fiber, calcium, thiamine and iron.  And if all this isn’t enough, most corn in this country is genetically modified.  Ya, no thanks. 

 
Cornless Cornbread
 
1 cup teff flour
1/4 cup potato starch
1/4 cup tapioca flour
1/4 cup white rice flour
1/4 cup teff seed
1/4 cup ground flax seed
1 1/2 tsp xanthan gum
1/2 t salt
1 T plus 1 tsp baking powder
1/4 cup honey
1 cup water
3 eggs
1/4 cup coconut oil
 
Preheat oven to 350 degrees.  Mix dry ingredients in large bowl.  Mix wet ingredients in separate bowl.  Combine wet and dry ingredients.  Batter is very thick.  Much like a muffin batter would  be.  Oil a 8×8 baking dish.  Spread batter in dish and smooth out the top.  Bake for about 30 minutes or until a toothpick comes out clean.  Eat warm from the oven, preferably covered in butter – but that’s just me.