Coconut Lemon Bars ~ The Paleo Way

Coconut Lemon Bars

Does anyone NOT like lemon bars.  They might be my favorite treat.  I’ve had good and I’ve had bad.  The bad ones are made with a jello mix, are sickly sweet and taste of fake lemon.  I wanted to make my own using real food.  I wanted them to be super lemony and not too sweet.  I also did not want the crust to be nut or grain based.  I think it is easy to get carried away with nuts so I am trying to switch up my baking and use more coconut than nuts like almonds etc.  Yes, I realize that cicinut is classified as a nut but coconut has a better Omega 3:6 ratio and as an added bonus is low oxalate.  These are not low carb but they are also not a cheat.  A treat, absolutely but not a cheat.  The filling recipe came from here.  (I would highly recommend checking out this guys blog.  He has lots of great looking recipes.  And does anyone else think that a man who can cook and bake is totally sexy??)  I created my own base.  The coconut chips I used are from Wilderness Family Naturals.  They are incredible and I did hesitate to use them in a recipe as they are not cheap (when you include shipping into the cost) and I would have been devastated if these didn’t turn out and I wasted all those coconut chips.  In the end it turned out to be well worth it.  So how good were they?  Me, who really does not have a sweet tooth ate probably 80% of the pan over the course of about 36 hours.  So, yes, they were a smashing success.  The kids hated them as expected due to the lemon in them and this suited me fine.   I do believe that I will have to make more of these ASAP, you know for quality control.  🙂  I believe these are GAPS legal and low oxalate as well as soy, corn, dairy, grain, gluten, refined sugar and nut free.  In case you are interested in seeing the evolution of this blog, check out my first recipe for Lemon Bars.

Crust

2 eggs

1/4 cup melted coconut oil (expeller pressed is fine if you don’t want to use your expensive virgin coconut oil)

2 T raw unfiltered honey

pinch of sea salt

1/4 cup coconut flour

1/4 cup coconut chips

1/2 cup coconut chips

Preheat oven to 350.  In a food processor combine eggs, coconut oil, salt and honey.  Mix to combine.  Add coconut flour and 1/4 cup of coconut chips.  Again, process until well combined.  Transfer to a bowl and stir in remaining coconut chips.  Grease a glass Pyrex baking dish with coconut oil.  My dish is 7×11 or 2.2 QT/2 L.   Press cookie batter base evenly into dish.  Bake for 18 minutes at 350 until the edges are just starting to brown and center is cooked through. 

Filling

1 cup freshly squeezed lemon juice (strained so there is no pulp)

6 whole eggs

1/3 – 1/2 cup raw unfiltered honey

1/2 cup coconut oil (I used expeller pressed.)

pinch of sea salt

Whisk lemon juice, eggs, salt and honey together in a large glass bowl or double boiler.  Bring about an inch of water to boil in a medium saucepan or bottom of double boiler.  Set the glass bowl on top of the boiling water.  The water should not be in contact with the bowl.  Slowly whisk in the melted coconut oil.  Continue to whisk as the water remains at a rolling boil.  DO NOT TURN YOUR BACK on this.  Whisk until it starts to thicken.  When it starts to thicken it gets thick FAST.  Remove from heat.  It should be thick enough to coat the back of a spoon.  Strain the filling through a fine mesh to remove any cooked egg bits.  Top the crust  and smooth it out.  Refrigerate.  My husband and The Civilized Caveman both thought this would have been great frozen too.  It probably would although that would have really slowed me down as I polished these all off.  (Hmmm maybe that is a good thing.)  Top with extra coconut chips as you see fit.  Refrigerate (or freeze) until set then devour!

This post was shared at: http://www.thehealthyhomeeconomist.com/monday-mania-1232012/, http://www.realfoodwholehealth.com/2012/01/fresh-bites-friday-january-27-2012/

Coconut Waffles with Fried Apple and Blueberry Topping

Sinless

I haven’t done a dessert/sweet breakfast for a while and I think it is about time.  I wanted to do something without nuts (coconut not included).  I have nothing against nuts of course but it is really easy to go over board with them.  Most desserts I make are nut based as are my muffins.  I made a chocolate almond muffin (not my recipe) a while back and just for curiosity sake I put the data into Nutrition Data.  I have to admit I was stunned with what I learned.  One small muffin was nearly 300 calories. Man, I hope that thing is wrong.   No, I don’t count calories nor do I even pay much attention to it but….holy crap that is a lot of calories for a SMALL muffin.  The other little detail about nuts that I try to be aware of is their omega 6 content.  It’s pretty easy to upset your Omega 6 : Omega 3 balance with nuts.  So anyway, last night I was craving something sweet – no doubt because I had had a smoothie earlier in the day.  (Anyone else like that?  If you have something sweet or higher in carbs than you are used to, then the cravings for other carby things kicks into overdrive?)  I went to my fridge and pulled out organic apples I had bought but turned out all mealy and soft (the kind that you have no choice but to cook them) and the remaining fresh organic blueberries (although I also made this with frozen and it worked out equally as good).  This is what I came up with.  I don’t really know what to call it other than a smashing success.  The kids loved it and literally licked their bowls clean.  Hubby gave it a thumbs up and helped himself to a second bowl.  We ate it right out of the bowl by itself but this morning the leftovers were used to top waffles.  Oh My!  It was incredible.  It’s a nice change from the usual bacon and eggs.  As an added bonus to it’s flavor is the fact that it is lower carb and has no refined sugars so I had one waffle with some of this sauce and didn’t feel hungry for hours and hours.  Had this been the sugary, gluten version I personally would have felt like crap right after and then felt hungry in less than 2 hours.  It also did not leave me craving carbs all day.  This topping would also be great on a minimally sweetened, dense, coconut pound cake.  I am not sure if this will qualify for GAPS legal because of the baking soda in the waffles and the iffy stevia but it is absolutely 100% paleo goodness.

Apple Blueberry Sauce

2 T coconut oil

3 apples, peeled, cored and sliced

1/2 tsp cinnamon

1/4 tsp cloves

3/4 cup fresh or frozen blueberries

1/2 cup coconut milk

pinch of salt

liquid stevia to taste (I used about 1/2 a dropper full)

Juice of 1/2 lemon

unsweetened coconut flakes

Heat saute pan, add virgin coconut oil.  Add apples and salt.  Saute for 5- 10 minutes until they begin to soften.  Add cinnamon, cloves, blueberries, coconut milk.  Continue cooking until apples are soft and sauce has thickened a bit.  When apples are soft remove from heat and add stevia and fresh lemon juice.  Stir to combine.  Serve hot in a bowl alone or serve on waffles or pancakes. Top with coconut flakes for garnish.

This waffle recipe was originally from The Food Lovers Primal Palate.  I made it as they wrote it first then made some changes that suited our tastes.  Here is what worked for us.  For about half of the recipe I made these as pancakes the other half as waffles.  It makes about 8 small waffles if you are only making waffles.

Waffles/Pancakes

1/4 cup coconut flour

4 eggs

pinch of sea salt

1/4 tsp baking soda

1/2 tsp cinnamon

1/4 tsp nutmeg

liquid stevia to taste (I used approx one dropper full)

1/4 cup melted virgin coconut oil

Combine all ingredients and mix well with electric mixer.  Tough hey?  I used a couple of tablespoons of the batter onto each of the four sections of my waffle maker so that the waffles were small.  They are done when the waffle is lightly brown and separates from the waffle maker easily.  (Or when the light comes on and the steam subsides.)  Top waffles/pancakes with Apple Blueberry sauce.

Chocolate Chip Scones (Almond Flour)

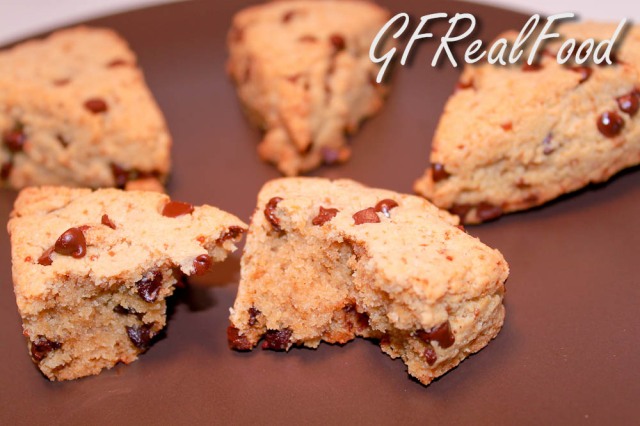
Chocolate Chip Scones, GFDFIt has been freakishly cold here today as it has in the rest of the country. When it is miserable outside I get this need to bake. It’s the only thing I want to be doing. Last week I ordered, for the first time, from Honeyville. I ordered blanched almond flour. I really needed to see if it was a whole lot better than the almond flour that I make. I thought it was going to be more expensive than it was. There is very little convenience in my kitchen so it is nice to be able to have the almond flour ready. Is it better than mine? It depends on what I’m making. If I were making chocolate chip cookies or my Almond Coconut Cookies I would certainly use my own almond flour. I like the slightly coarser texture. The Honeyville Blanched Almond flour is really fine and powdery as well as lighter in color. I made these Cinnamon Bun Muffins yesterday and they were fabulous. I, of course, used coconut oil in place of the grapeseed oil and used coconut sugar and less of it in place of agave. The muffins were very light in texture. The recipe made 8 muffins and they were all gone in a matter of 2 hours. I now need to figure out a bread recipe that uses almond flour. Anyway, back to the chocolate chip scones. I wanted something today that was only slightly sweet. I think the next time I make these I will use only 1 T of coconut sugar. The sweetness of the chocolate chips should be enough. This recipe made 8 scones and they were absolutely perfect with a cup of green tea on this “cold” Arizona day. These are gluten free, grain free and dairy free. If you could save a couple of these for the following morning they would make a great breakfast. See mom, here is another breakfast without toast! 😉

Chocolate Chip Scones

1 1/4 cup blanched almond flour

2 T granulated coconut sugar

1/4 tsp baking soda

1/4 tsp (I used slightly more) sea salt

1 egg

3 T melted coconut oil

1/4 cup Enjoy Life Mini Chocolate Chips

Preheat oven to 350. Line baking sheet with parchment paper. In medium bowl combine first 4 ingredients. Add melted coconut oil and lightly beaten egg. Mix well with a fork. Fold in chocolate chips. Transfer dough to parchment lined baking sheet and form a ball. Press ball down until it is about 1 1/2 thick or about 8 inches in diameter. Cut into 6wedges. Separate the slices evenly on the sheet. Bake for approximately 15 minutes or until the edges are starting to brown slightly and the centers are firm to touch. Let cool to room temperature and serve.

Brioche (Gluten and Dairy Free)


Heavenly Brioche
Heavenly GFCF Brioche

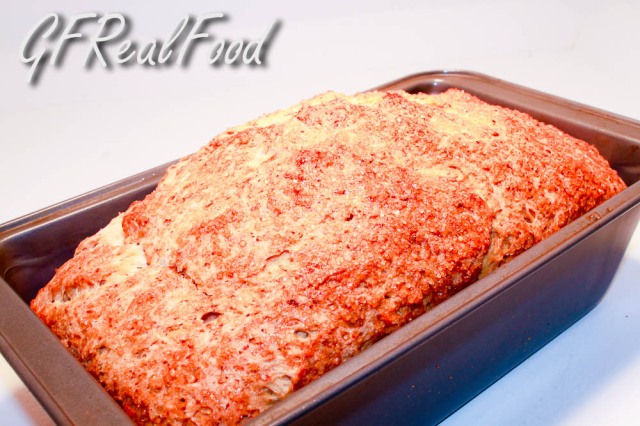
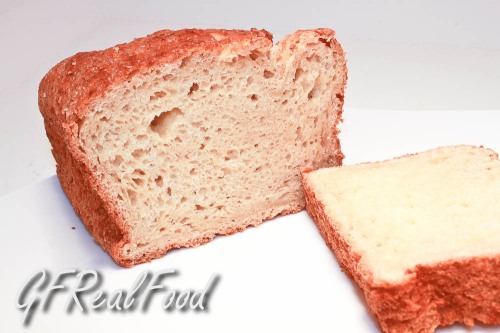
Have you ever come across one of those recipes that at first glance it instantly makes you drool and crave?  Then the feeling of such intense need overcomes you that you completely forget about your diet or promise to yourself to eliminate sugar and grain?  Well this is what happened to me yesterday, at 5pm, while I should have been making dinner.  I found this recipe quite accidentally.  I certainly wasn’t looking for a Brioche recipe but there it was and I had to make it – right then.  The original recipe comes from The Culinary Life.  It looks like she got the recipe from a cookbook called Healthy Bread in Five Minutes a Day.  How this particular bread could be deemed healthy is beyond me but I’m not going to worry about that today because this bread is OUTSTANDING.  We all need a little treat sometimes, right?  Anyway, the original recipe was not dairy free.  It also contained brown rice flour which I have never purchased before so I had to make several changes to the recipe to suit our needs.  The result was surprisingly light, moist, sweet and flavorful.  It looks like and smells like wheat bread.  Best yet it has the texture of wheat bread.  It is soft, fluffy, tender and elastic.  The original recipe made 3 loaves and the directions explained how to make the dough and store it in the fridge so you could have 3 fresh loaves days apart.  I purposely made enough for only one loaf.  This stuff would be dangerous to keep around the house.  Here is what I did with the recipe.

Brioche – Gluten and Dairy Free

1/3 cup teff flour

1/3 tapioca flour

1 1/3 cup corn starch

2 tsp dry active yeast

1 tsp sea salt

2 tsp xanthan gum

1/2 cup water

1/2 cup canned coconut milk

2 small eggs

1/3 cup honey

1/3 cup melted coconut oil (I used expeller pressed)

1 tsp vanilla

raw sugar for sprinkling on top

melted coconut oil for greasing pan and for handling the dough

Mix the dry ingredients together in a bowl.  In the bowl of a stand mixer combine wet ingredients.  Add dry into wet and mix until there are no lumps of dry flour.  Scrape down sides of bowl a couple of times during mixing.  Using a spatula, form dough into a ball in the bottom of the bowl.  Cover mixer bowl with a clean dish towel and let it rest and rise at room temperature for 2 hours.  Meanwhile prepare a nonstick loaf tin (8.5 x 4.5 inch) by greasing with coconut oil.  After the 2 hours, liberally coat your hands with melted coconut oil and form dough into a ball with your hands.  Transfer dough into loaf pan and gently shape and smooth the loaf to fit the pan.  Smooth the top of the loaf (something I could have done better).  At this point I sprinkled some raw sugar on top and allowed the loaf to rise for another 40 minutes.  Preheat oven to 350.  Bake for 40-45 minutes until the top is a caramel brown and is firm to the touch.  After cooling a bit remove it from the pan.  Now here is the really difficult part, the part in which I failed: let the loaf cool before slicing and eating.  Hope you have better luck than I did.  Because I was impatient, I compressed the loaf a bit during the slicing.  It would have appeared fluffier had I waited.  I didn’t care, it tasted great. 

 GFCF Brioche

Since I finished this loaf just before 9pm I refrained from eating more than one slice which took an enormous amount of willpower.  In the morning this Brioche became amazing french toast.  The recipe for that is coming soon!

If this recipe is up your alley go check out The Culinary Life.  She has some amazing looking recipes.  The next time I have a blow it day I am going to try her Brioche Cinnamon Rolls.  They look amazing.

Nut Bars

I’ve made these nut bars twice in 3 days. I love love love them. They are perfect as a quick snack. They are filling and satisfying. They are exactly what I need when in between meals and craving a little something sweet. That said, they are not overly sweet. They are much more subtle. My kids love those Lara Bars but I can’t stand them because they are too sweet and pretty high in carbs. I got this recipe from Mark Sisson’s Cookbook, “Primal Blueprint Cookbook.” I’m not much into cookbooks because there is so much you can get online for free. However, this cookbook is actually worth the money. Everything I’ve tried has been really, really great. Everything is grain free, sugar free, free of processed foods and largely dairy free. It’s the only cookbook I have purchased in years. As always I have made a few changes to the original recipe. Here is what worked for us.

Nut Bars

1 cup raw almonds

1 1/2 cup pecans

2/3 cup unsweetened finely shredded coconut

2/3 cup whole flax seed

1/4 cup almond butter

1/2 tsp sea salt if your almond butter is not salted – less if it is

1/4 cup melted virgin coconut oil

2 T raw honey (agave for vegan)

1/4 cup gluten and dairy free chocolate chips*

In a large bowl food processor add the first six ingredients. Process until the meal is as fine as it will get. Then add the coconut oil and honey and process until it is well combined. Hand mix in chocolate chips if using. Line a 8×8 baking dish with parchment paper. Press down to cover bottom of pan. Chill in refrigerator for 2-3 hours or until firm. These bars are gluten free, grain free, dairy free, soy free, vegan if you sub agave nectar for the honey, free of processed sugar, low carb and high in protein.

*I use Enjoy Life miniature chocolate chips. Not only do they taste great but I like them because they are tiny so the chocolate doesn’t over power. They are also soy free and only have 3 ingredients.

How To Make Your Own Almond Flour

Can anyone tell me what makes a man tick?  Because I am at a loss.  My husband whom I think is (usually) a genius leaves me scratching my  head.  Why?  Let me tell you how my day started.  We have 2 of iPod touches, the ones that have Face to Face which is video calling.  First just let me say that I hate the idea of video calling.  I don’t want to be bothered worrying about how I look just to make a phone call.  It’s great for the kids and Grandma and for the kids and my husband or I while at work.  However it’s not great when the iPod rings at 5:20 am because my husband, who was at work, thought I would be awake and he wanted to demonstrate to a male co-worker how the thing worked.  Seriously?!  I ignored the call and tried to go back to sleep.  Then he called back at 6:30.  I had just woke up and was barely upright or even thinking yet.  I answer the call and while waiting to connect see myself on the screen and ponder what has become of me.  Can you now imagine how mortified I am when the call connects and there is Ron’s co-worker staring back at me.  Seriously, what was my husband thinking?!  Now I know better than to show my face when I answer a call.      

One of my favorite blogs is Elana’s Pantry.  Nearly everything this woman posts looks great.  For me the problem is that she uses a lot of almond flour.  I love almond flour, just not the price.  She recommends one particular brand, Honeyville Blanched Almond Flour.  While I’m sure it is a great product, I just can’t see myself spending that kind of money on flour.  As I have said before on this blog, we grind a lot of our own flours.  We grind amaranth, millet, buckwheat, quinoa, rice and corn.  We save a TON of  money doing it this way.  Since I am leaning toward a grain free diet lately it got me wondering if I could make my own almond flour.   Turns out that yes, I can.  It’s quick and easy.  I have used this almond flour for cookies, muffins and pancakes.  So far everything I have tried with it has worked out great.  I have never purchased almond flour so I guess I have nothing to compare mine too but I expect that mine is moister so I need to use a bit less oil in whatever recipe I am using if the recipe calls for commercial almond flour.  The only things you need to make this is a coffee grinder (preferably not one that you use coffee beans for) and a wire mesh sieve.   

Here’s how I do it.  

Larger Pieces Sifted Out

Add 1/3 to 1/2 cup of whole raw almonds to the coffee grinder.  Grind until you have a fine meal.  When you hear the grinder make a different noise and the almond meal inside is not moving well anymore, stop.  If you continue you will be making chunky almond butter.  Pour the almond meal into a sieve which is sitting in a large bowl.  Shake out the almond flour into the bowl.  The larger meal and some bigger pieces will be left over.  Just leave them in the bowl for now and repeat the process until you have the amount you need.  Then add back into the grinder all those small pieces and the courser meal and grind again.   

Closer Look

This slideshow requires JavaScript.

I must get at my day now.  The kids found the small head of a salamander in the living room this morning.  I have got to locate the rest of him.  Yup, that’s desert life!

Lemon Bars

Gluten Free Lemon Bars


I live in Arizona.  We have more sun here than anywhere else in the country.  This is a great thing.  When it does rain or is cool and overcast I get such an intense desire to bake.  This has been one of the wettest January/February’s on record.  So consequently I have been doing a ton of baking.  Seriously, if the sun doesn’t come out to stay for a while I may get too big to get out the door.  A couple of days ago I made an angel food cake from scratch.  It was pretty good except the recipe I was adapting it from called for orange extract instead of vanilla or almond and I thought it sounded interesting so I tried it.  The cake was good but I hated the orange in it.  It completely ruined it for me.  However, next rainy day you know what I’ll be up to.  The cake recipe used 12 egg whites so I was left with 12 egg yolks that I needed to find a use for.  I came across a site that listed a bunch of different uses for egg yolks.  One of the ideas was lemon bars with real lemon curd on top.  I love lemon bars.  They are a favorite of mine although they are rarely lemony or tart enough for my liking.  So, enter wickedly tart lemon squares.  I made them last night and WOW they are awesome.  They are super lemony and a bit tart but very sweet too.  True, this is not the kind of recipe I usually post but in my defense I really had to use up those egg yolks.  I don’t want to give the impression that I am all about health food or that I have a perfect diet.  I soooooo don’t.  I only aspire to.   

Well, since I am being honest I have to confess that for me, these perfect lemon bars were like crack, not that I know what that is like first hand.  I made them last night and all day today kept coming back for just one more taste.  By dinner time I realized that half of the 9×13 pan was gone.  I ate most of it since Ron was at work.  That is really not like me.  Of all the sweet things I make I usually only have one or two small servings.  This dessert was different.  So when I realized what I had done I felt immediate guilt.  My first thought was that I would call my friend and neighbor to see if she would take the rest of them so that I didn’t finish them myself.  Then, like an addict, I thought, no I want it all to myself, I don’t want to share.  I went back and forth like this for a couple hours.  Seriously.  Then I came to my senses and called Susanne.  Unbelievably she had the NERVE to say NO!  What kind of friend says no when you tell them you need help?  I needed her to share the calories with me and to at least half the guilt.  NO!?  Then she had the audacity to ask me if I had been to the gym this week!!!  I told her to “Shut it!”  

Tomorrow is another day.  Susanne, you are so ON!  I just needed that kick in the pants.  I hate you today.  I’ll love you tomorrow.  Maybe I should shame myself into eating better and getting to the gym by posting my weight and measurements…..  Or maybe not.  

Lemon Bars 

Shortbread  Base 

2 sticks of butter (1 cup) cold and cut into cubes (see how good this is starting out?) 

1/2 cup sugar 

1 1/2 cup Kim’s All Purpose Flour 

1 cup millet flour 

Lemon Filling 

12 egg yolks 

1 1/2 cups sugar 

1 – 1 1/4 cup fresh squeezed lemon juice 

1/2 cup melted butter 

pinch of salt 

zest from 5 lemons (maybe 2-3 TBSP) Use a fine microplane for this. 

Preheat oven to 325 degrees.  In a food processor add the cold butter and sugar.  Process until smooth.  Then add your flours.  Process until the flour is blended in and it forms a ball.  Dump out the shortbread into a 9×13 glass Pyrex pan.  Press dough down to an even layer.  Bake for 35 minutes or until the edges just barely start to brown.  While that is baking make the lemon curd.  In a saucepan over medium- low heat add your egg yolks, sugar and salt.  Whisk together until smooth.  Add the melted butter and all that lemon juice.  While stirring constantly, use a candy thermometer to slowly reach a temperature of 196 degrees.  Do not boil it or the eggs will curdle.  Once the filling has thickened and can coat the back of a wooden spoon, remove from heat and immediately pour it through a fine mesh.  I almost skipped this part because my filling looked completely smooth.  I did it anyway and sure enough there were tiny bits of cooked egg.  Add the lemon zest and stir well.  When the base is cooked pour filling over top and smooth to edges.  Drop the temperature of your oven to 300 degrees and cook for an additional 10  minutes.  Remove from the oven and leave it to come to room temperature.  Then refrigerate for a minimum of 1 hour for it to set.  When it comes out of the oven it will look like the filling is not set.  Don’t worry, it will set in the fridge.  To serve you can cut into squares and dust with powdered sugar.  Or you can do it like I did.  Keep taking tiny slivers off the edges, don’t use a plate, pop it right into your mouth and then you can try to convince yourself that you didn’t just eat half the pan.

Best GF Brownies

Happy Valentines Day everyone!

I am a firm believer that there are some things that shouldn’t be messed with.  Some things should not be made healthy or less sinful.  Brownies are at the top of my list.  Cheesecake comes in second.  Since it is Valentines Day  there seems to be a need for chocolate today.  I pulled out my old favorite brownies recipe and made it gluten free.  I didn’t make them dairy free today but it could easily be converted to df by subbing the choice of oil.  I first looked at a bunch of other recipes and most seemed like more work than I was up for today.  The brownies that I used to make prior to being gluten free were not only the best I had ever had, even without frosting but they are about as easy to make as you could possibly get.  These are no more difficult to make than buying a mix.  Only with these ones you will end up paying a very, very small fraction of what you would have paid for a mix and these are much better tasting.  These are moist, tender and chewy and like I said, I don’t even frost them.   The original recipe came from Allrecipes.com and the author was “Angie”. 

Easy Gluten Free Brownies

1/2 cup melted butter (or for dairy free try grapeseed oil or coconut oil)

1 cup sugar

2 eggs

1 tsp vanilla

1/3 cup cocoa powder

1/2 cup Kim’s All Purpose GF Flour

1/4 tsp salt (you might want to add a bit more if you are using oil instead of butter)

1/4 tsp baking powder

Preheat oven to 350 degrees.  Grease and flour a 8×8 baking pan.  In a large bowl melt butter.  Add sugar and stir well.  Add eggs, vanilla and salt.  Stir well.  Add flour, cocoa and baking powder.  Mix well.  Pour batter into prepared pan and spread into corners and smooth the top.  Bake for 25 – 30 minutes until center is set.  Do not overbake.

Almond Coconut Cookies

Almond Coconut Cookies

 I have been trying to decrease my intake of sugar and simple carbs. I usually don’t really have a sweet tooth but because I am trying not to eat sugar I am therefore craving it. So this morning I wanted to make a cookie that would satisfy my craving for something sweet but would still be lower in carbs and even offer some nutrition. These cookies are gluten free, dairy free, egg free, soy and corn free and very low in sugar. They are sweetened with a bit of honey. What they are not is taste free. They are surprisingly good. Additionally they are high in fiber and are incredibly satisfying. And Yes! the kids and husband actually like them. Store them in the fridge and feel free to use these as a healthy snack in between meals.           

Almond Coconut Cookies         

2 cups raw almonds
1 cup fine shredded unsweetened dried coconut aka coconut powder
1/8 tsp cardamom
1/4 cup melted coconut oil
1/4 cup honey (or agave nectar for vegan)
1/2 tsp sea salt
4 oz 60% -72% chocolate. (I used Ghirardelli)         

In a food processor add almonds and process until you have as fine a meal as your machine will make. Add remaining ingredients and process for another minute or two. When you see the “dough” coming into a ball it is done.  If it doesn’t come into a ball, keep adding more oil until it comes together.  The oil is what holds the cookies together.  Line cookie sheets with parchment paper. Take teaspoons full and roll into balls and press down into discs about 1/2 inch thick. Bake in preheated 350 degree oven for 10 minutes until they are just starting to brown. While cookies are baking, slowly melt melt chocolate in a small nonstick pot. When cookies are done let them cool for a bit then drizzle chocolate over top. Store in the fridge.   

This post was posted at the following Blog Carnivals:    

Wholesome Whole Foods     

Food Revolution Fridays

Food Renegade