Grain Free Tortillas

IMG_6195

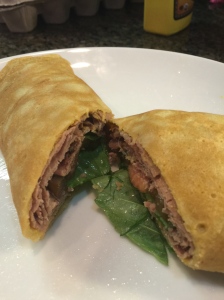
Yes, I’ve been MIA again.  Life just seems to get busier every year.  I’ll spare you the details for now but I just wanted to share something I thought was so exciting.  Grain free tortillas!  I’ve made versions of this with coconut flour but coconut flour has a very distinctive flavor that I like in baked goods but not much else.  These tortillas are soft, elastic and pliable with a neutral flavor.   Aren’t tortillas really about what you are eating them with??  These stayed together, didn’t get soggy and weren’t grainy.  Can you tell I’ve tried several different versions?  I’ve been doing a lot of reading about gut health, our microbiota and  increasing dietary fiber.  I’m certainly guilty of not having anywhere near enough soluble or insoluble fiber in my diet for years and years on end.  And I’ve paid the price.  So in my quest to rectify that I’ve been trying out new foods to work with.  Plantains were on that list.  Plantains have about 57 grams of carbohydrate for a medium green one.  Yes, that’s a lot but I’ve never come close to eating a whole one in one sitting anyway.  Of those carbs 4 grams are resistant starch.  Resistant starch is a type of dietary fiber that we are unable to digest.  It travels down to our large intestine where our bacterial army does it’s magic.  That starch/fiber is what our gut bacteria feed on.  If we don’t feed our micro flora they don’t tend to stick around and proliferate.  We can take probiotics but unless we feed them they are transient and temporary.  Why is our gut bacteria important?  Well, It’s what keeps us healthy.  80% of our immune system is in our guts.  It drives our metabolism and those bacteria are the producers of butyrate.  Butyrate is a byproduct or waste product of our bacteria feeding on the resistant starch.  That butyrate is used by our bodies as energy.  It is also a powerful inflammatory in our guts, it helps decrease gut permeability and because that starch isn’t digestible by us but by our bacteria there is no spike in our blood sugar.  Actually, resistant starch improves insulin sensitivity and reduces blood sugar. Amazingly, it has a “second meal effect” meaning that it helps control your blood sugar for the following meal as well as the meal in which it was consumed. Resistant starch is associated with a decreased risk of colon cancer and may help with weight loss due to its ability to decrease blood sugar spikes post meal.  It may help decrease appetite and help to maintain lean muscle mass.

Anyway, back to the recipe.  These are the reasons I am excited to find a way to enjoy plantain.  Now to the recipe.  This was super fast and easy.  You will need a high powered blender and a large nonstick pan.

Ingredients:

1 green plantain

2 eggs

2-3 T milk or water

pinch of sea salt

coconut oil for the pan

IMG_6192

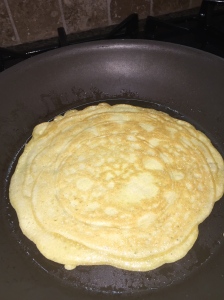
Peel and slice the plantain.  Add it and the eggs and salt to the blender.  Blend until smooth. Add just enough milk to thin out the batter so that you can pour out the batter into a thin layer.  Water may work just as well if you are dairy free.  Heat pan and enough coconut oil to lightly cover the bottom.  Pour about 1/4 cup of batter into the hot pan and swirl the pan or use the back side of a spoon to spread the batter into and 8-10 inch round.  Cook on medium heat until the bottom side is lightly browned and then flip to brown the top side.  When finished lay it on a plate covered with a paper towel.  Repeat for the rest of the batter stacking them on top of each other with paper towel in between.  These were great warm with a little butter (has to be Kerrygold!) or dipped into olive oil.  I added some Italian seasoning to one batch and it was great.  Next time I will try some herbs de provence.  Cumin and coriander might be good too.  When they are completely cooled the paper towels can be removed and these can be stored, covered in the fridge.  Warm slightly in the microwave for a few seconds to enjoy them later.  They are just as soft, elastic and pliable the next day.
Banana Chocolate Chip Muffins

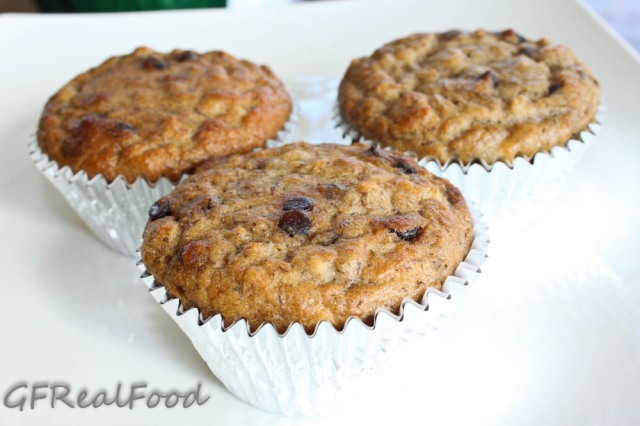
I hate the idea of throwing things away.  I had 3 big over ripe bananas sitting there waiting to be used.  I tweaked an old recipe of mine for Banana Nut Muffins and they turned out great.  The kids loved them.  My 7-year-old who isn’t a big eater tossed back 2 right away and then asked if I could make more for her lunch.  Sure!  No problem.  These were really quick to make despite the fact my 3-year-old was “helping”.  These muffins are not sweetened with anything but bananas.   Well, bananas and chocolate chips.  🙂  They are grain, nut, gluten, soy, dairy free and have no added sugar.  AND the kids still loved them. 

Banana Chocolate Chip Muffins

3 mashed over ripe bananas 

1/2 tsp baking soda

6 eggs

1/4 cup melted coconut oil 

1/2 tsp nutmeg

1/2 tsp salt

1/2 cup coconut flour

1/2 cup chocolate chips (I use ENJOY LIFE)

I’m not much into the mucking around with the mixing of the wet in one bowl and then mixing of the dry in another bowl and then finally mixing the two together.  Sifting?  Forget it.  Way too many dishes.  So… Preheat your oven to 350.  In a large bowl add the bananas and mash them a bit.  You can use your hands for this and save dirtying yet another piece of kitchen equipment.  Add the eggs, baking soda, salt, nutmeg and melted coconut oil.  Use a hand mixer and mix until well blended.  Add the coconut flour and mix until pretty smooth.  Then stir in your chocolate chips.  Line 11 cupcake tins with liners.  I used a level ice cream scoop to spoon the batter into the lined tins.  12 would have made a nice number but the ice cream scoop made this recipe in 11.  Bake for 25-30 minutes until the tops are lightly browned and a toothpick inserted into the middle comes out clean.  These are great warm.  If there are any left after these cool store them in the fridge.

This post was shared at: http://www.thehealthyhomeeconomist.com/monday-mania-1232012/, http://www.realfoodwholehealth.com/2012/01/fresh-bites-friday-january-27-2012/

Coconut Lemon Bars ~ The Paleo Way

Coconut Lemon Bars

Does anyone NOT like lemon bars.  They might be my favorite treat.  I’ve had good and I’ve had bad.  The bad ones are made with a jello mix, are sickly sweet and taste of fake lemon.  I wanted to make my own using real food.  I wanted them to be super lemony and not too sweet.  I also did not want the crust to be nut or grain based.  I think it is easy to get carried away with nuts so I am trying to switch up my baking and use more coconut than nuts like almonds etc.  Yes, I realize that cicinut is classified as a nut but coconut has a better Omega 3:6 ratio and as an added bonus is low oxalate.  These are not low carb but they are also not a cheat.  A treat, absolutely but not a cheat.  The filling recipe came from here.  (I would highly recommend checking out this guys blog.  He has lots of great looking recipes.  And does anyone else think that a man who can cook and bake is totally sexy??)  I created my own base.  The coconut chips I used are from Wilderness Family Naturals.  They are incredible and I did hesitate to use them in a recipe as they are not cheap (when you include shipping into the cost) and I would have been devastated if these didn’t turn out and I wasted all those coconut chips.  In the end it turned out to be well worth it.  So how good were they?  Me, who really does not have a sweet tooth ate probably 80% of the pan over the course of about 36 hours.  So, yes, they were a smashing success.  The kids hated them as expected due to the lemon in them and this suited me fine.   I do believe that I will have to make more of these ASAP, you know for quality control.  🙂  I believe these are GAPS legal and low oxalate as well as soy, corn, dairy, grain, gluten, refined sugar and nut free.  In case you are interested in seeing the evolution of this blog, check out my first recipe for Lemon Bars.

Crust

2 eggs

1/4 cup melted coconut oil (expeller pressed is fine if you don’t want to use your expensive virgin coconut oil)

2 T raw unfiltered honey

pinch of sea salt

1/4 cup coconut flour

1/4 cup coconut chips

1/2 cup coconut chips

Preheat oven to 350.  In a food processor combine eggs, coconut oil, salt and honey.  Mix to combine.  Add coconut flour and 1/4 cup of coconut chips.  Again, process until well combined.  Transfer to a bowl and stir in remaining coconut chips.  Grease a glass Pyrex baking dish with coconut oil.  My dish is 7×11 or 2.2 QT/2 L.   Press cookie batter base evenly into dish.  Bake for 18 minutes at 350 until the edges are just starting to brown and center is cooked through. 

Filling

1 cup freshly squeezed lemon juice (strained so there is no pulp)

6 whole eggs

1/3 – 1/2 cup raw unfiltered honey

1/2 cup coconut oil (I used expeller pressed.)

pinch of sea salt

Whisk lemon juice, eggs, salt and honey together in a large glass bowl or double boiler.  Bring about an inch of water to boil in a medium saucepan or bottom of double boiler.  Set the glass bowl on top of the boiling water.  The water should not be in contact with the bowl.  Slowly whisk in the melted coconut oil.  Continue to whisk as the water remains at a rolling boil.  DO NOT TURN YOUR BACK on this.  Whisk until it starts to thicken.  When it starts to thicken it gets thick FAST.  Remove from heat.  It should be thick enough to coat the back of a spoon.  Strain the filling through a fine mesh to remove any cooked egg bits.  Top the crust  and smooth it out.  Refrigerate.  My husband and The Civilized Caveman both thought this would have been great frozen too.  It probably would although that would have really slowed me down as I polished these all off.  (Hmmm maybe that is a good thing.)  Top with extra coconut chips as you see fit.  Refrigerate (or freeze) until set then devour!

This post was shared at: http://www.thehealthyhomeeconomist.com/monday-mania-1232012/, http://www.realfoodwholehealth.com/2012/01/fresh-bites-friday-january-27-2012/

Coconut Waffles with Fried Apple and Blueberry Topping

Sinless

I haven’t done a dessert/sweet breakfast for a while and I think it is about time.  I wanted to do something without nuts (coconut not included).  I have nothing against nuts of course but it is really easy to go over board with them.  Most desserts I make are nut based as are my muffins.  I made a chocolate almond muffin (not my recipe) a while back and just for curiosity sake I put the data into Nutrition Data.  I have to admit I was stunned with what I learned.  One small muffin was nearly 300 calories. Man, I hope that thing is wrong.   No, I don’t count calories nor do I even pay much attention to it but….holy crap that is a lot of calories for a SMALL muffin.  The other little detail about nuts that I try to be aware of is their omega 6 content.  It’s pretty easy to upset your Omega 6 : Omega 3 balance with nuts.  So anyway, last night I was craving something sweet – no doubt because I had had a smoothie earlier in the day.  (Anyone else like that?  If you have something sweet or higher in carbs than you are used to, then the cravings for other carby things kicks into overdrive?)  I went to my fridge and pulled out organic apples I had bought but turned out all mealy and soft (the kind that you have no choice but to cook them) and the remaining fresh organic blueberries (although I also made this with frozen and it worked out equally as good).  This is what I came up with.  I don’t really know what to call it other than a smashing success.  The kids loved it and literally licked their bowls clean.  Hubby gave it a thumbs up and helped himself to a second bowl.  We ate it right out of the bowl by itself but this morning the leftovers were used to top waffles.  Oh My!  It was incredible.  It’s a nice change from the usual bacon and eggs.  As an added bonus to it’s flavor is the fact that it is lower carb and has no refined sugars so I had one waffle with some of this sauce and didn’t feel hungry for hours and hours.  Had this been the sugary, gluten version I personally would have felt like crap right after and then felt hungry in less than 2 hours.  It also did not leave me craving carbs all day.  This topping would also be great on a minimally sweetened, dense, coconut pound cake.  I am not sure if this will qualify for GAPS legal because of the baking soda in the waffles and the iffy stevia but it is absolutely 100% paleo goodness.

Apple Blueberry Sauce

2 T coconut oil

3 apples, peeled, cored and sliced

1/2 tsp cinnamon

1/4 tsp cloves

3/4 cup fresh or frozen blueberries

1/2 cup coconut milk

pinch of salt

liquid stevia to taste (I used about 1/2 a dropper full)

Juice of 1/2 lemon

unsweetened coconut flakes

Heat saute pan, add virgin coconut oil.  Add apples and salt.  Saute for 5- 10 minutes until they begin to soften.  Add cinnamon, cloves, blueberries, coconut milk.  Continue cooking until apples are soft and sauce has thickened a bit.  When apples are soft remove from heat and add stevia and fresh lemon juice.  Stir to combine.  Serve hot in a bowl alone or serve on waffles or pancakes. Top with coconut flakes for garnish.

This waffle recipe was originally from The Food Lovers Primal Palate.  I made it as they wrote it first then made some changes that suited our tastes.  Here is what worked for us.  For about half of the recipe I made these as pancakes the other half as waffles.  It makes about 8 small waffles if you are only making waffles.

Waffles/Pancakes

1/4 cup coconut flour

4 eggs

pinch of sea salt

1/4 tsp baking soda

1/2 tsp cinnamon

1/4 tsp nutmeg

liquid stevia to taste (I used approx one dropper full)

1/4 cup melted virgin coconut oil

Combine all ingredients and mix well with electric mixer.  Tough hey?  I used a couple of tablespoons of the batter onto each of the four sections of my waffle maker so that the waffles were small.  They are done when the waffle is lightly brown and separates from the waffle maker easily.  (Or when the light comes on and the steam subsides.)  Top waffles/pancakes with Apple Blueberry sauce.

My Morning 8 Ball – Squash “Pancakes”

Paleo Pancakes

Paleo Pancakes

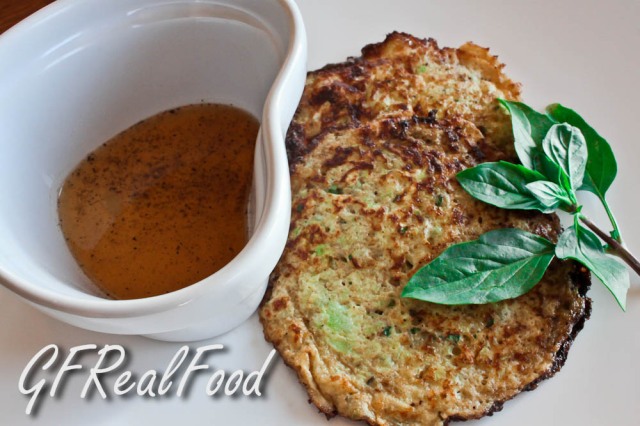
Several weeks ago I signed up for my first CSA (community supported agriculture). A CSA is a wonderful thing. (If you are in the Phoenix area, this is the one I use.) I have been so impressed with everything about this. Once a week I pick up a large paper bag filled with 8 different things. It is mostly veggies and occasionally some fruit. Everything is organic, local and SUPER fresh. Another reason I am loving this is that I am receiving things that I normally wouldn’t buy or even think to try. One week there were dandelion greens in the bag. I had never tried them before and for that matter have never seen them for sale anywhere either. We tried them and liked them. It’s been fun for me to figure out what to do with the variety of foods I receive each week. Last week I received a squash I had never seen of, nor heard of, before. It’s called an eight ball squash. The first time I made them I stuffed them with a meat/veggie mix and covered them with a vegan “cheese” sauce. It was pretty good but not blog worthy. I got more of those squash this week. On a whim I came up with this. It was so incredibly good! My very picky four-year old said, “they don’t look very good but they are YUMMY!” I was honestly stunned. She ate 3 of them! They are simple, low carb and very satisfying. I fried these in lots of bacon fat which added a lot of flavor to a relatively bland veggie. You save your bacon fat, right? That stuff is like gold! Since most people probably don’t have eight ball squash lying around you could use yellow squash, grey mexican or zucchini too. They taste very similar. I served them with a Vietnamese style dipping sauce. These savory pancakes are low carb, GAPS legal, grain, soy, dairy, corn, and gluten free.

See mom, here is another grain free breakfast!

Eightball Squash Savory Pancakes

2 eight ball squash (navel orange size)

6 eggs

1 tsp celtic sea salt (to taste – I like salt so beware)

freshly ground black pepper

1 T coarsely chopped fresh basil

bacon fat or fat of choice

Vietnamese Style Dipping Sauce

1/4 cup preservative free fish sauce

juice of 1 lemon

2 T water

freshly ground black pepper

Slice squash in half and scoop out the seeds. Then with a veggie peeler, peel the skin off. Cut in large chunks and place in food processor. Pulse briefly to a coarse chop, then add eggs, salt, pepper and basil to bowl and process again until well combined. In a preheated cast iron pan add 2-3 T bacon fat. Then scoop egg /squash mixture out in 2-3 T heaps. Fry on med – med/low until eggs are set and the bottoms are browned. Carefully flip. They are quite tender so you really need a lot of fat in the pan so they don’t break apart due to sticking. Cook the second side until browned. Remove from pan to a plate lined with paper towel to soak up any extra drippings.

While you are frying the rest of the pancakes mix all ingredients for the sauce in a bowl.

Serve together while pancakes are still hot.

This recipe has been shared at Monday Mania 6/6/11 @ The Healthy Home Economist.

Pizza Eggs

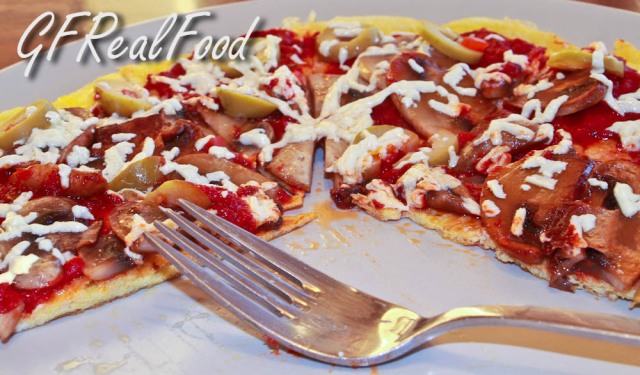
Pizza EggsYou would think that since we raise chickens for eggs that I like eggs.  I don’t.  Not really.  I eat them because they are fast and easy in the morning.  But do I love them? No.  I have however come up with a way to eat and enjoy eggs.  Actually, I really enjoy this.  I have made it 3 times in the last week.  My six year old loves it too.  It makes me happy to hear her ask for this and to see her eat a high protein, grain free breakfast before going to school.  I make this dairy free for me by using Daiya dairy free cheese substitute.  Everyone loves pizza.  This version is a gigantic step up from the high carb, wheat filled one I grew up with (and loved).  I watched an episode of Jamie Oliver’s Food Revolution.  In it he showed that kids are served pizza for breakfast in schools.  This kind of pizza for breakfast would be a much better alternative, don’t you think?  This is quick and filling as well as low carb, high protein,  grain and gluten free and can be made dairy free.  Hey mom look it is another breakfast without toast!

Pizza Eggs

1 tsp expeller pressed coconut oil

3 eggs lightly beaten

salt and pepper to taste

1 can of tomato paste (6oz)

3 T olive oil

1/2 tsp basil

1/2 tsp dried oregano

toppings of your choice (I like sautéed mushrooms, sliced green olives, pepperoni and caramelized onions but realistically the onions take too long)

cheese or Daiya cheese substitute

Start with your sauce since once the eggs get started you are almost done.  Mix together tomato paste, salt and pepper, olive oil and dried herbs.  Add as much water as you like to get it to the consistency you like your sauce.  I like mine quite thick.  You will need a 8 inch nonstick pan if your trusty cast iron pan is like mine.  I can’t trust that it could do an omelette.  Heat oil over medium heat.  Lightly beat eggs together with salt and pepper.  Pour eggs into pan and cover.  Keep a close eye on it and as soon as the eggs are 75% set flip the juicy eggs out onto a flat plate.  Then slide the eggs back into the pan cooked side up.** Once the eggs are flipped turn the heat off but keep the pan on the heat source.  Top with a generous amount of sauce, toppings and cheese.  Replace lid and let sit for a few minutes while the cheese melts.  For your toppings keep in mind that they are not going to be cooked just lightly warmed.  Slide pizza out onto plate, slice and serve. 

** This is the tricky part for me – trying to not brown the eggs.  I don’t like browned eggs.

This recipe has been entered in The Healthy Home Economists Monday Mania for 2/7/11.