Mini Pumpkin Chocolate Chip Muffins

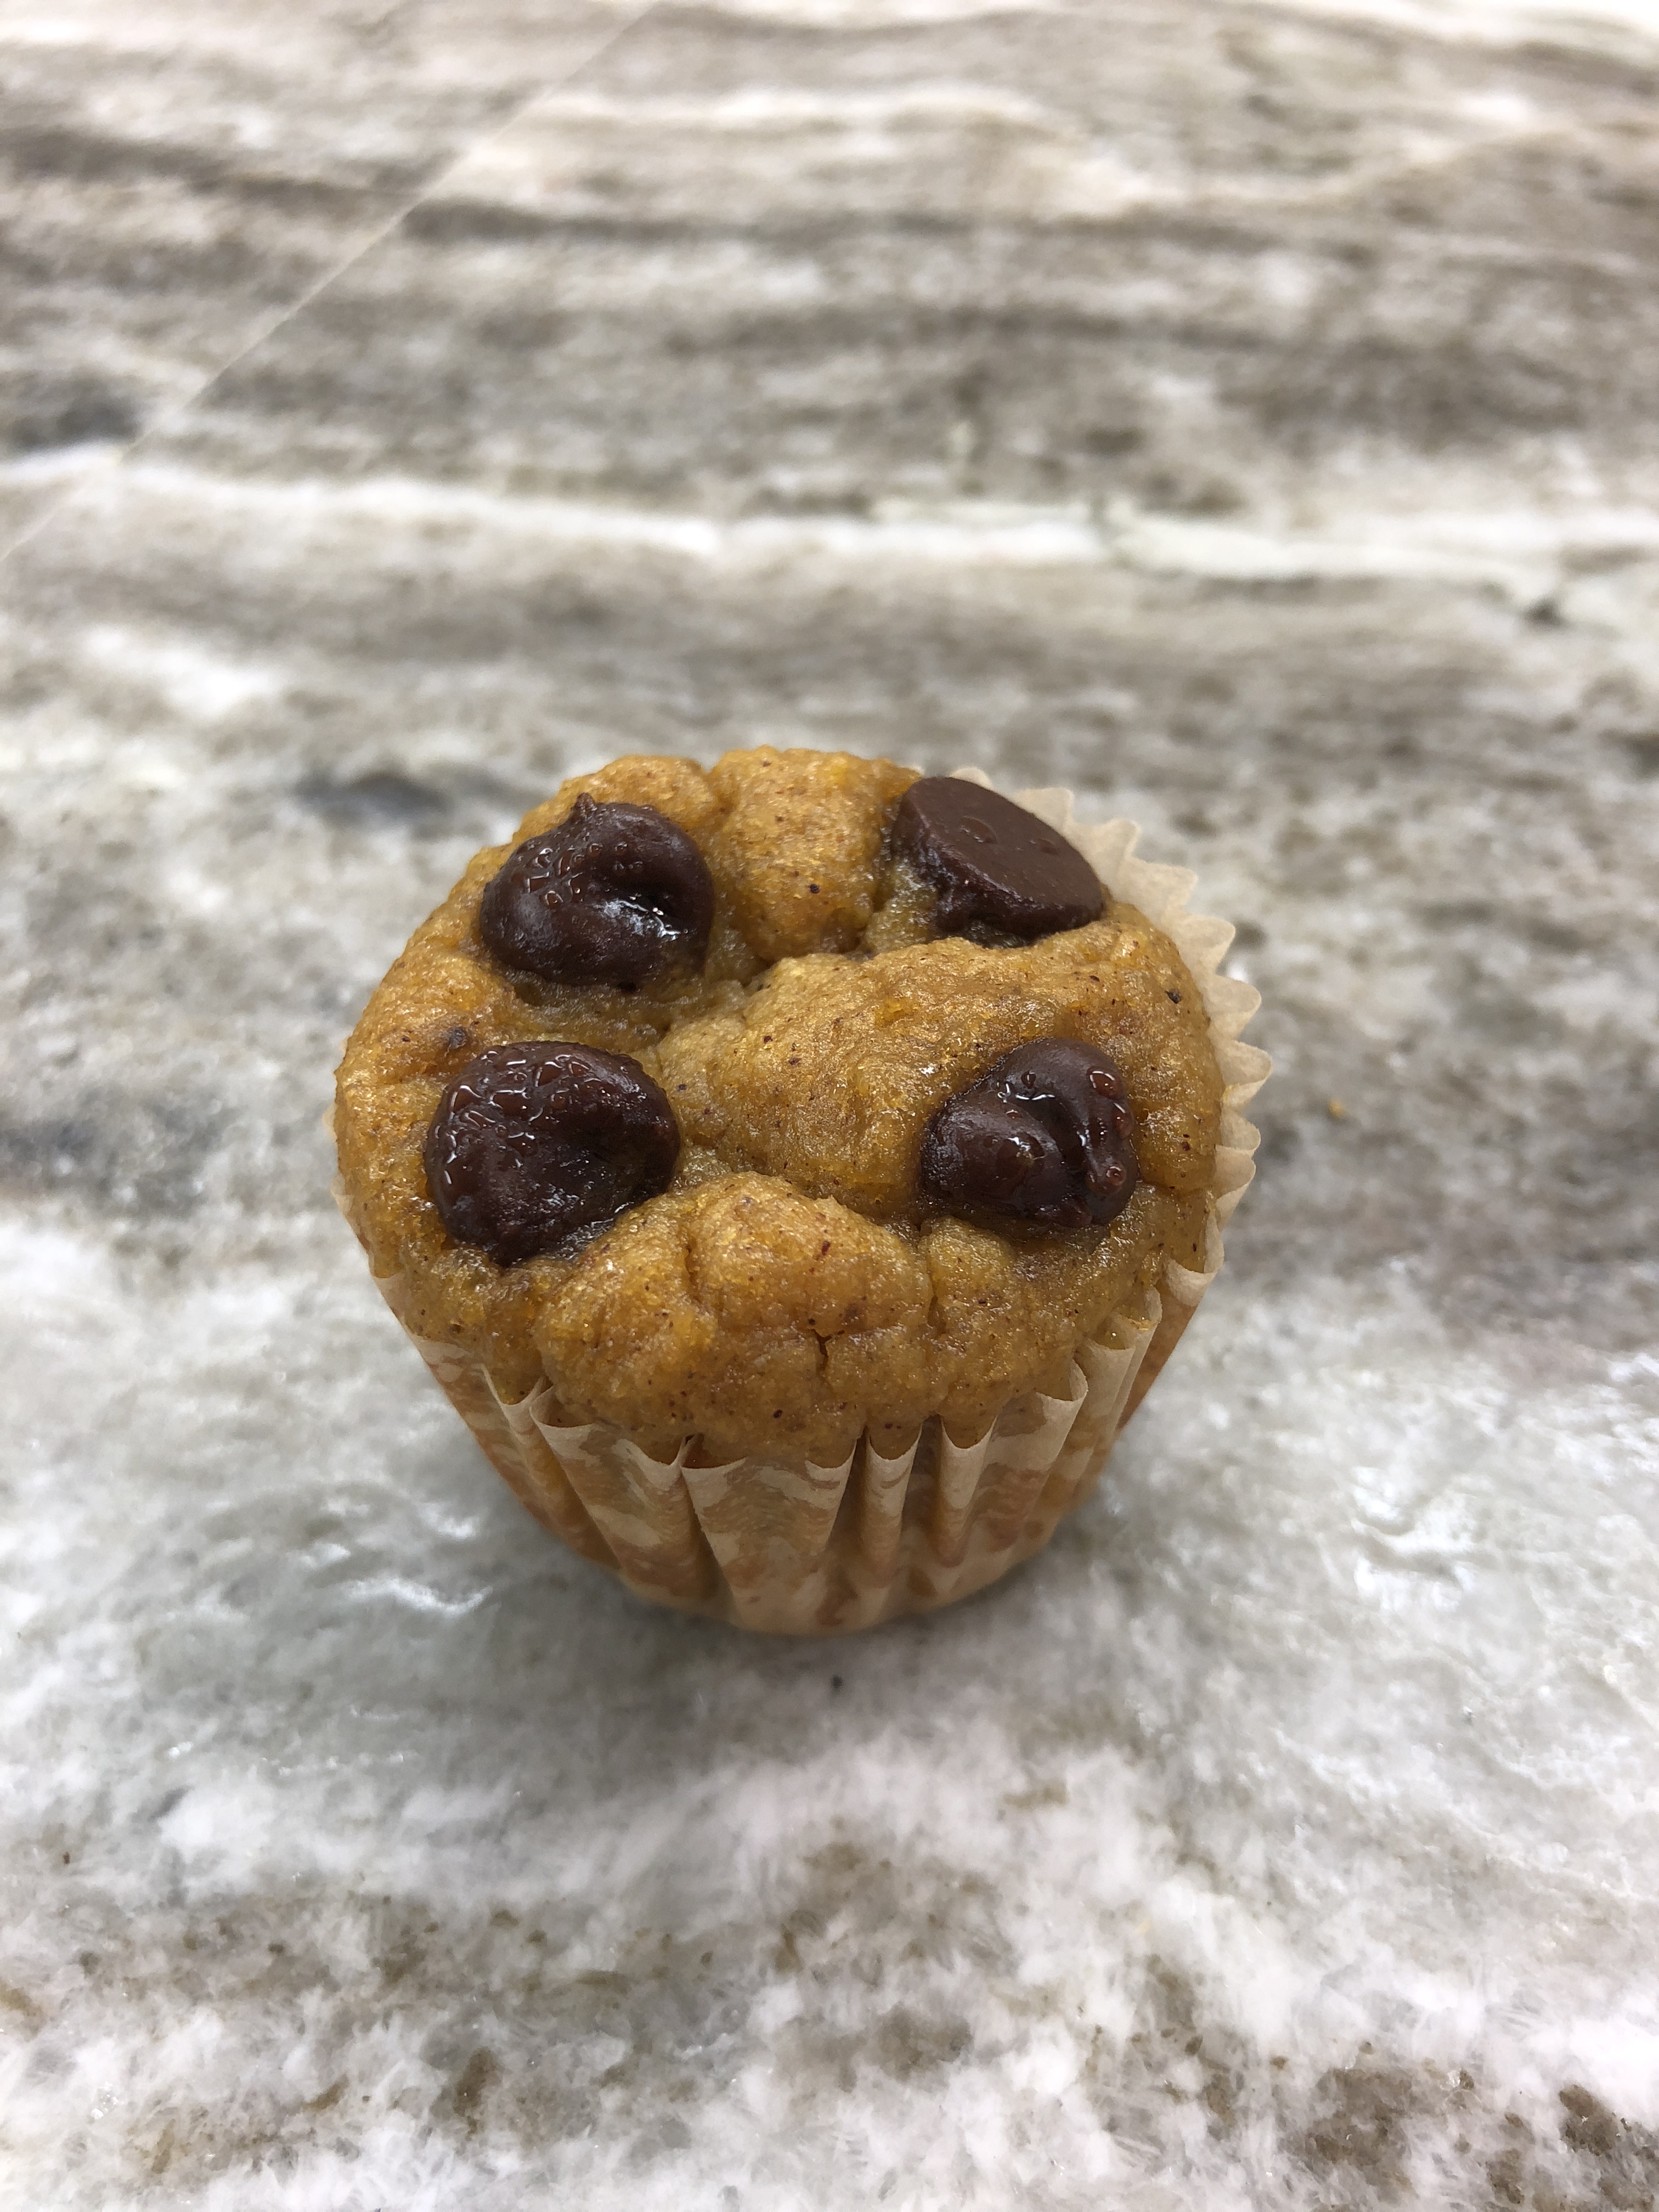
I made these yesterday.  They were so good that all 24 disappeared in the first few hours. All 5 kids liked them and that included Mr. Picky.  I was winging it as I went so I’ll be honest I was surprised that they turned out so well.  They are light, fluffy, moist and not too sweet which is what will ruin it for me.  So I went back today to recreate them and write down what I did so I can continue to repeat.  Here is what success takes like.

56200728965__155975C5-3BE2-4C43-8113-0CC915B59E18.JPG

1 slightly packed cup of blanched almond flour

1/2 tsp salt

1/2 tsp baking soda

1 tsp pumpkin pie spice

1/4 cup melted coconut oil

1/3 cup maple syrup (you can add more or less to taste)

8 oz canned pumpkin (approximately half a 15 oz can)

1 ripe banana

3 eggs

chocolate chips to decorate top


Preheat oven to 350 degrees.  Add dry ingredients to food processor and process until combined.  Add the remaining ingredients except the chocolate chips.  Blend until smooth.  Line 24 mini muffin tins with parchment paper liners.  Parchment liners are so much better than paper because nothing sticks to them.  Top them with a few chocolate chips.  Bake for 20 min or until a toothpick comes out clean.

Stillwater Bar and Grill at Pebble Beach Resort, California 

Over the last few years I have been cooking less but I’ve had the opportunity to have some amazing meals out at incredible restaurants. I still eat completely gluten free and largely grain free. I thought I’d share with you some of the photos I’ve taken in my travels. My most recent trip to Carmel California had too many stunning dishes with unparalleled views of the Pacific Ocean to list them all but here are some. 


During a recent weekend getaway to Carmel we stopped for lunch at Stillwater Bar and Grill. http://www.pebblebeach.com/dining/the-lodge-at-pebble-beach/stillwater-bar-and-grill. 

It was an amazing lunch. This was our view. 

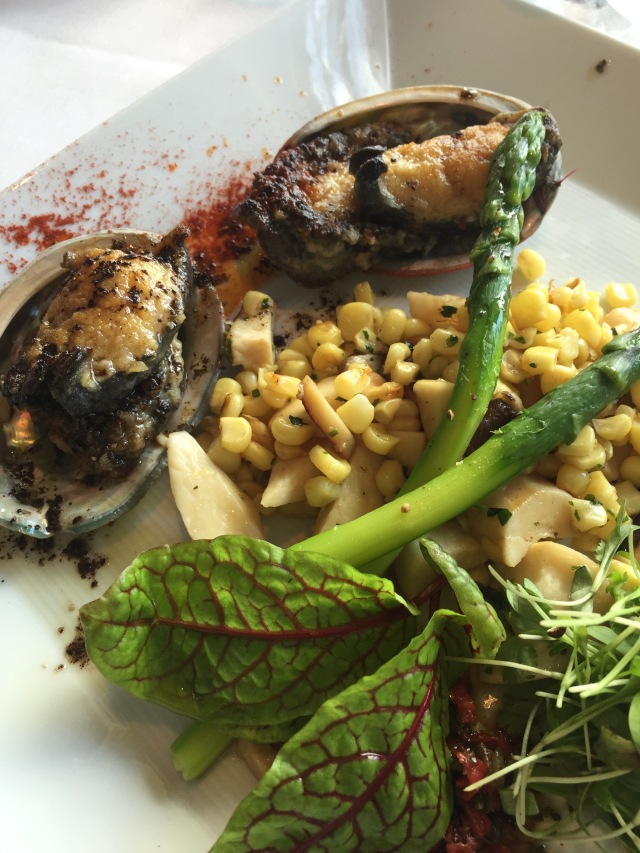
I had abalone for the first time. It did not disappoint. I had to be schooled in what abalone was. It is a shell fish that has to be harvested by hand and done as a free dive. Scuba gear is not allowed. Limits are set as to how many can be harvested at once. It was so so good. It came with a pasta dish that I subbed for their veggie of the day which was a corn and mushroom dish. I’m not usually a huge fan of corn but this was awesome.


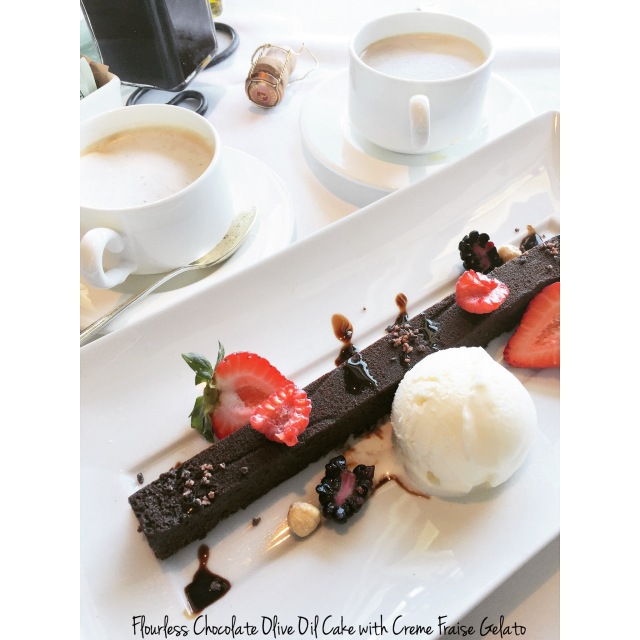
The dessert was one of the most memorable I’ve ever had. I don’t have much of a sweet tooth so it’s not hard for me to walk away from dessert. Besides that I’m sick of the four options I’m usually limited to: creme brûlée, sorbet, gelato or fruit. So when I saw this dessert, “Flourless Chocolate Olive Oil Cake with Creme Fraise Gelato, hazelnuts and fresh berries” I just couldn’t leave without trying. It was so worth the extra carbs and calories. I ate nearly the entire thing by myself. It was absolutely stunning. I imagine this will be the dessert that I compare all others to.   

Grain Free Tortillas

IMG_6195

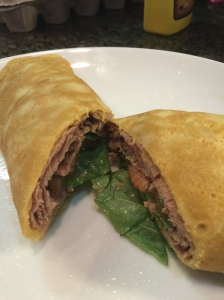
Yes, I’ve been MIA again.  Life just seems to get busier every year.  I’ll spare you the details for now but I just wanted to share something I thought was so exciting.  Grain free tortillas!  I’ve made versions of this with coconut flour but coconut flour has a very distinctive flavor that I like in baked goods but not much else.  These tortillas are soft, elastic and pliable with a neutral flavor.   Aren’t tortillas really about what you are eating them with??  These stayed together, didn’t get soggy and weren’t grainy.  Can you tell I’ve tried several different versions?  I’ve been doing a lot of reading about gut health, our microbiota and  increasing dietary fiber.  I’m certainly guilty of not having anywhere near enough soluble or insoluble fiber in my diet for years and years on end.  And I’ve paid the price.  So in my quest to rectify that I’ve been trying out new foods to work with.  Plantains were on that list.  Plantains have about 57 grams of carbohydrate for a medium green one.  Yes, that’s a lot but I’ve never come close to eating a whole one in one sitting anyway.  Of those carbs 4 grams are resistant starch.  Resistant starch is a type of dietary fiber that we are unable to digest.  It travels down to our large intestine where our bacterial army does it’s magic.  That starch/fiber is what our gut bacteria feed on.  If we don’t feed our micro flora they don’t tend to stick around and proliferate.  We can take probiotics but unless we feed them they are transient and temporary.  Why is our gut bacteria important?  Well, It’s what keeps us healthy.  80% of our immune system is in our guts.  It drives our metabolism and those bacteria are the producers of butyrate.  Butyrate is a byproduct or waste product of our bacteria feeding on the resistant starch.  That butyrate is used by our bodies as energy.  It is also a powerful inflammatory in our guts, it helps decrease gut permeability and because that starch isn’t digestible by us but by our bacteria there is no spike in our blood sugar.  Actually, resistant starch improves insulin sensitivity and reduces blood sugar. Amazingly, it has a “second meal effect” meaning that it helps control your blood sugar for the following meal as well as the meal in which it was consumed. Resistant starch is associated with a decreased risk of colon cancer and may help with weight loss due to its ability to decrease blood sugar spikes post meal.  It may help decrease appetite and help to maintain lean muscle mass.

Anyway, back to the recipe.  These are the reasons I am excited to find a way to enjoy plantain.  Now to the recipe.  This was super fast and easy.  You will need a high powered blender and a large nonstick pan.

Ingredients:

1 green plantain

2 eggs

2-3 T milk or water

pinch of sea salt

coconut oil for the pan

IMG_6192

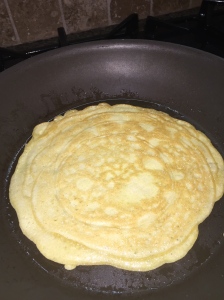
Peel and slice the plantain.  Add it and the eggs and salt to the blender.  Blend until smooth. Add just enough milk to thin out the batter so that you can pour out the batter into a thin layer.  Water may work just as well if you are dairy free.  Heat pan and enough coconut oil to lightly cover the bottom.  Pour about 1/4 cup of batter into the hot pan and swirl the pan or use the back side of a spoon to spread the batter into and 8-10 inch round.  Cook on medium heat until the bottom side is lightly browned and then flip to brown the top side.  When finished lay it on a plate covered with a paper towel.  Repeat for the rest of the batter stacking them on top of each other with paper towel in between.  These were great warm with a little butter (has to be Kerrygold!) or dipped into olive oil.  I added some Italian seasoning to one batch and it was great.  Next time I will try some herbs de provence.  Cumin and coriander might be good too.  When they are completely cooled the paper towels can be removed and these can be stored, covered in the fridge.  Warm slightly in the microwave for a few seconds to enjoy them later.  They are just as soft, elastic and pliable the next day.

Smooth and Creamy Chicken Liver Pate

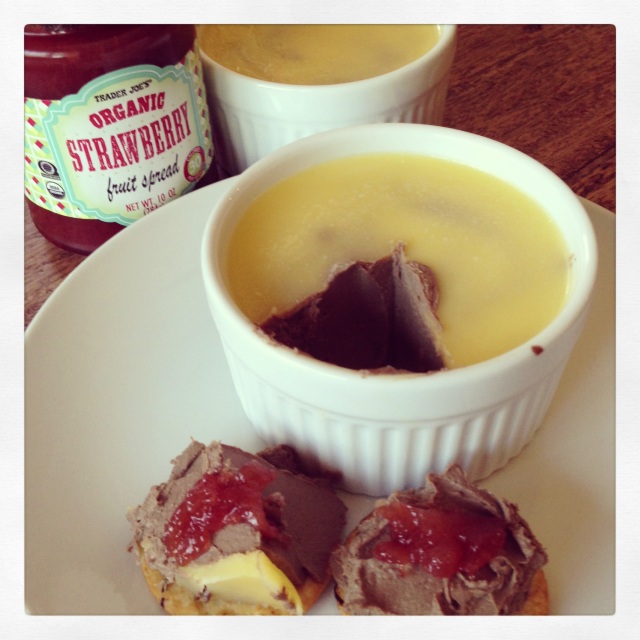
Super rich and creamy chicken liver pate.

Super rich and creamy chicken liver pate.

I haven’t blogged for so long that I forgot my password.  And truth be told I originally wrote this back in September of 2012 but am just now getting around to adding a picture.  This is my favorite pate.  I had a pate at a great restaurant and I really liked it.  It was a little different than what I’ve had before and it got me playing in the kitchen with it.  I have made this so many times now and this is the first time I have written the recipe down.  This is not for those with a fat phobia.  It has a stick and a half of butter in it.  I’m telling you that I alone can polish off a pound of chicken livers in a couple days all by myself and you should know that I don’t like liver.  I guess I should say I didn’t like liver because I love this.

Here is what you will need.

1 cup cream sherry

1 small onion finely chopped

10 whole allspice berries (are these things berries?)

5 whole cloves

1 cinnamon stick

10 whole black peppercorns

fresh nutmeg (just a few grates over the microplane)

2 bay leaves

1 – 1.25 lb of chicken livers (the worst part of this recipe is removing all the connective tissue)

1/4 tsp ground cinnamon

1 stick of salted butter

salt to taste

approximately 4 -6 T melted butter (I like to use Kerrygold pastured butter for this part because it tastes better and the color is so rich.)

Serve with plain rice crackers and a fruit only (no sugar) jam or jelly

In a large saucepan add the sherry, onion, cinnamon stick, allspice, peppercorns, bay leaves and cloves.  Simmer on medium low for about 10 minutes while you clean the livers.  Then add the livers and ground cinnamon and grated nutmeg.  Cook about another ten minutes, covered, over medium high heat until the livers are just cooked through.  Don’t overcook them as it makes them tough.  By the time they are cooked through most of the liquid as reduced.  Remove from heat.  Here comes the tedious part.  You have to go through and remove all the allspice, cloves, bay leaves, peppercorns and the cinnamon stick.  This is why its a good idea to count them out before you add them so that you can make sure you get them all out.  Add the livers to a food processor or Vitamix.  Turn it on and add a stick of cold butter one tablespoon at a time while it is running.  Turn it off intermittently to scrape down the sides.  Let it run for at least 5 minutes depending on how effective your food processor is.  It won’t take that long if you are doing it in a Vitamix.  Add salt to taste.  It should end up being completely smooth.  Then pour the pate into three or four ramekins.  Smooth the tops and cover with the remaining melted butter.  This will seal it and it will keep in the fridge for a week but I can tell you that it won’t last that long.  (Incidentally it also freezes well.  Defrost it in the fridge.)  Let it set in the fridge overnight covered with plastic wrap.  My favorite way to have this is in big wedges on a plain rice cracker topped with a tiny dot of jam or jelly.

Gluten Free Real Food

Paleo Mayo

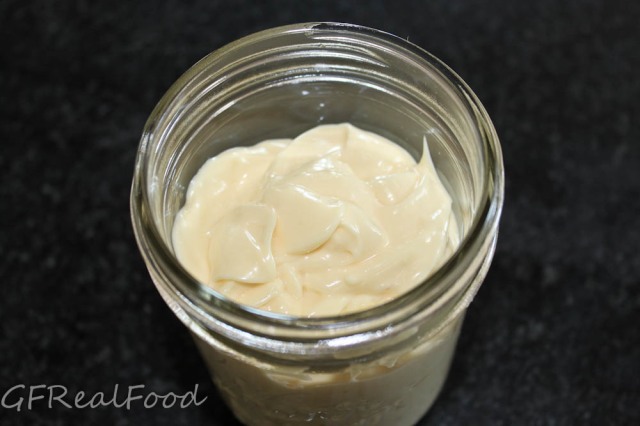
I love mayo.  I like it on nearly everything.  It’s a great way to get more coconut oil in your diet.  Commercial mayos are out for me for several reasons.  I prefer to avoid canola oil (high in omega 6 and canola is grown with LOTS of pesticides), soybean oil (I’m allergic to soy and it would likely be GMO soy anyway), preservatives, and the use of commercial eggs.  So, I make my own.  I think it tastes better and because all of the ingredients are good for me, I can slather it on everything and not have any guilt over it.  It takes about 5 minutes to make.  I would want to use it up within the week due to the raw eggs in it.  If you want to make it last weeks or even months just add 2 T of whey to it at the end and then…

View original post 321 more words

Crunchy Paleo Cranberry and Seed Crackers

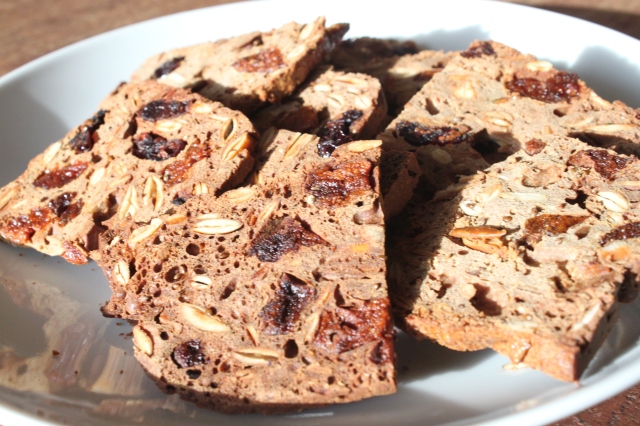
Paleo Cranberry and Seed Crackers

Paleo Cranberry and Seed Crackers


Have you been looking for a good grain free cracker that is crispy and crunchy like a cracker should be?  Me too.  I like my previous crackers very much.  They were almond and flax based and very tasty.  These crackers however are completely different.  No almonds in sight.  They are very crispy and crunchy and will stand up to being heavily smeared with goat cheese.  I served these at a dinner party last weekend to a bunch of non paleo, gluten eaters and there wasn’t a crumb left over.  I think that speaks volumes.  I got the idea for this after making Carol’s Gluten Free Seed and Nut Bread.  I made it exactly as written which is a rare thing for me and it was amazing.  I got thinking that it reminded me of a GF cracker I had this summer in Whistler, BC.  These crackers are the best GF cracker I’ve ever had but they are not grain free and the only variety that is GF is impossible to find in stores which I personally think is a mistake on their part.  So with Carols bread recipe and that cracker in my head I came up with this amazing little cracker.  This is 100% exactly what I wanted it to be.

1 cup sunbutter (as in peanut butter made out of sunflower seeds instead of peanuts.  Trader Joes carries it.)

3 eggs

2 T coconut oil

2 T honey

1/4 cup tapioca starch

1/2 tsp sea salt

2 T chia seeds

1/2 cup dried whole cranberries**

12 unsulfured dried apricots diced to about the size of the cranberries

1 cup whole roasted pumpkin seeds

Preheat oven to 350 degrees.  Lightly oil a standard sized loaf pan with coconut oil then line the pan with wax paper.  Cut off the paper that hangs over the sides of the pan.  This doesn’t have to be pretty.  It just helps the loaf pop out easily.  With a hand mixer combine the sunbutter, eggs, oil, honey and salt.  Mix in the tapioca and chia seeds.  When that is well mixed hand stir in the apricots, cranberries and pumpkin seeds.  Put the batter in the pan and smooth out the top.  Bake for 45 minutes and cool.  Slice the loaf as thinly as you can.  I cut each slice in half so that they are smaller.  Line a cookie sheet with parchement paper.  Lay the crackers out on the pan.  Bake in a 300 degree oven for about 30-40 minutes or until they are lightly browned, dry and crispy.  Let them cool completely.  They become more crunchy when they are cooled.

**I have used dried cherries in here too.

GF Cranberry Pecan Bread

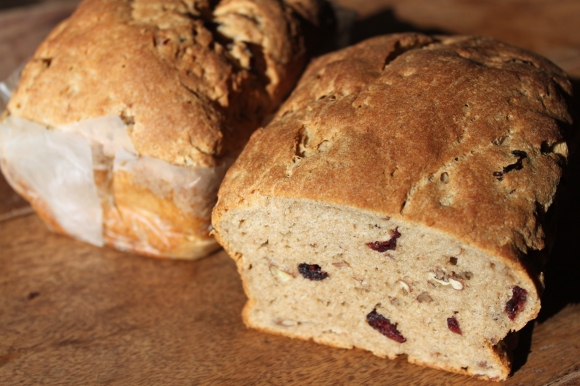
Image

Ok, this recipe is not in any way paleo.  Not even close.  That said, despite the fact that I have been mostly paleo/primal for the last 2 years this blog gets more traffic from my bread recipes (see here, and here) than anything else.  So, for those that want great gluten free bread that is better than anything you can find in a store, that is moist and tender and doesn’t have a grainy texture or fall apart if you look at it funny, here it is.  This is a slightly sweet bread and is really nice for a change.  I hope you enjoy as much as I did.

Wet Ingredients

3 eggs

1/3 cup expeller pressed melted coconut oil

1/3 cup honey

1 1/3 cup very warm water

1/3 cup dried cranberries

1 T yeast

Dry Ingredients

1 cup sorghum flour

1 cup tapioca flour

1/2 cup ivory teff

1/2 cup dark teff 

1 1/2 tsp salt

1 T plus 1/2 top xanthan gum

1/2 cup chopped raw pecans

Preheat oven to 200 degrees and then turn it off keeping the oven light on.  Heat water (it needs to be pretty hot because when you add it to the eggs etc it will cool down considerably.  After adding the water to your other wet ingredients you want the temperature to end up being about body temperature.)  Add cranberries to soak for a couple of minutes while you get the other wet ingredients assembled.   In the bowl of your stand mixer add the eggs, melted coconut oil and honey and mix well.  Add water and cranberries and yeast and stir until combined. Let it sit so the yeast will proof while you assemble your dry ingredients and prepare your pans.  Using mini loaf pans lightly grease with coconut oil and then line with wax paper.  This doesn’t have to be pretty or exact.  It won’t matter in the end.  Roughly trim the edges of the paper so it doesn’t hang over the sides too far.  In a large bowl sift all of your flours with the xanthan gum and salt.  When your liquid ingredients look all foamy add the dry ingredients with the mixer on medium low.  Mix well.  Scrape down the sides.  Mix on medium speed for 2-3 minutes until well combined.  Add pecans and mix through.  Divide the dough between the two pans.  Coat your hands in melted coconut oil and smooth the tops of the loaves.  Make sure your oven is turned off with the light on and place the pans on the middle rack to rise for 25 minutes.  When the time is up turn on the oven to 350 degrees and set the timer for 38 minutes.  No need to pull the bread out to pre-heat the oven.  When they are done remove from oven and let cool on the counter top, in the pans.  When they are cool enough to touch you can remove from the pans and slice and serve.

Asian Slaw

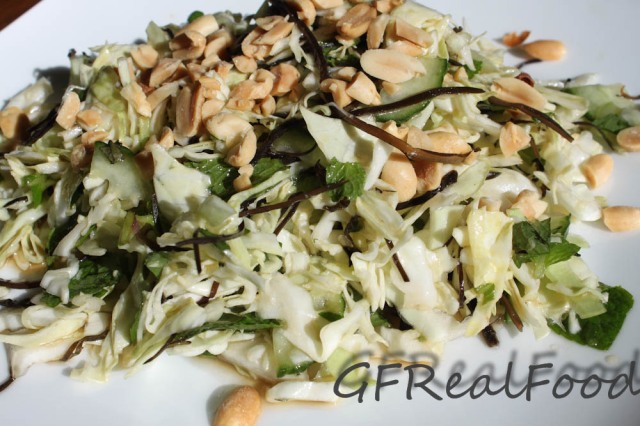
Yes, those are peanuts in the picture.  No, I don’t usually eat those.  Sunflower seeds are a better choice.  The second time I made this I did have sunflower seeds and used those.  I liked it better.  I came up with this idea after eating at my favorite Vietnamese restaurant.  I get the same salad every time I go there.  Their version likely has soy in it and now that I think about it probably wheat because they use regular soy sauce.  Hmmm and I wonder what they sweeten it with.  I know it isn’t honey… Crap!  The restaurant also adds daikon radish, shrimp and BBQ pork (and does not have the seaweed in it).  I want to try that at home too but that will require some pre-planning.  Does ayone have a good recipe for Vietnamese BBQ pork??   This salad is sweet and salty and was whipped up in 10 minutes.  I almost didn’t post this recipe.  I realize that most people don’t keep Thai basil and arame in their house as a staple. I don’t expect this to be a very popular post.  However, this is currently my favorite salad and if you happen to have access to the ingredients I highly recommend it.

Asian Slaw

Half a head of green cabbage – shredded

1 english cucumber with the skin on – quartered and sliced

fresh Thai basil – handful

fresh mint – handful

big pinch of dried arame (seaweed)

sunflower seeds as a topping

Dressing

1/4 cup EVOO

3 T Braggs liquid aminos or coconut aminos

1 T sesame oil

1/4 cup unsweetened rice vinegar

3-4 T raw honey

Soak the arame in room temperature water.  It softens in just a few minutes and doubles or triples in size.  Next make your dressing.  Combine all ingredients in another bowl and whisk together until well blended.  In your food processor using the slicing blade shred half a head of cabbage.  You could do this by hand too if you are less lazy than I.  Then slice your english cucumber lengthwise into quarters and feed it through the food processor (or slice by hand).  Very coarsely chop the Thai basil and mint.  Add cabbage, basil, cucumber, mint and arame to a large bowl.  Mix everything together.  Dress the salad as you need it.  The dressing keeps well in the fridge.  Top with a handful of sunflower seeds.

This post was shared at http://www.realfoodwholehealth.com/2012/01/fresh-bites-friday-january-27-2012/

Banana Chocolate Chip Muffins

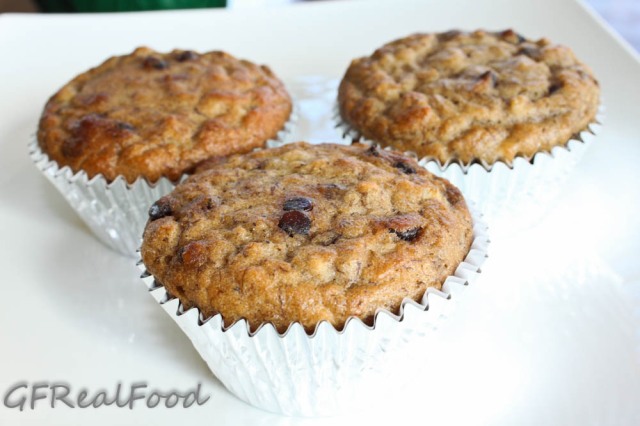
I hate the idea of throwing things away.  I had 3 big over ripe bananas sitting there waiting to be used.  I tweaked an old recipe of mine for Banana Nut Muffins and they turned out great.  The kids loved them.  My 7-year-old who isn’t a big eater tossed back 2 right away and then asked if I could make more for her lunch.  Sure!  No problem.  These were really quick to make despite the fact my 3-year-old was “helping”.  These muffins are not sweetened with anything but bananas.   Well, bananas and chocolate chips.  🙂  They are grain, nut, gluten, soy, dairy free and have no added sugar.  AND the kids still loved them. 

Banana Chocolate Chip Muffins

3 mashed over ripe bananas 

1/2 tsp baking soda

6 eggs

1/4 cup melted coconut oil 

1/2 tsp nutmeg

1/2 tsp salt

1/2 cup coconut flour

1/2 cup chocolate chips (I use ENJOY LIFE)

I’m not much into the mucking around with the mixing of the wet in one bowl and then mixing of the dry in another bowl and then finally mixing the two together.  Sifting?  Forget it.  Way too many dishes.  So… Preheat your oven to 350.  In a large bowl add the bananas and mash them a bit.  You can use your hands for this and save dirtying yet another piece of kitchen equipment.  Add the eggs, baking soda, salt, nutmeg and melted coconut oil.  Use a hand mixer and mix until well blended.  Add the coconut flour and mix until pretty smooth.  Then stir in your chocolate chips.  Line 11 cupcake tins with liners.  I used a level ice cream scoop to spoon the batter into the lined tins.  12 would have made a nice number but the ice cream scoop made this recipe in 11.  Bake for 25-30 minutes until the tops are lightly browned and a toothpick inserted into the middle comes out clean.  These are great warm.  If there are any left after these cool store them in the fridge.

This post was shared at: http://www.thehealthyhomeeconomist.com/monday-mania-1232012/, http://www.realfoodwholehealth.com/2012/01/fresh-bites-friday-january-27-2012/
Coconut Lemon Bars ~ The Paleo Way

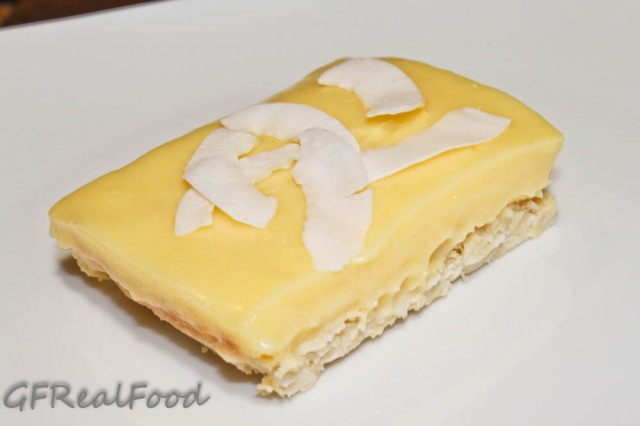
Coconut Lemon Bars

Does anyone NOT like lemon bars.  They might be my favorite treat.  I’ve had good and I’ve had bad.  The bad ones are made with a jello mix, are sickly sweet and taste of fake lemon.  I wanted to make my own using real food.  I wanted them to be super lemony and not too sweet.  I also did not want the crust to be nut or grain based.  I think it is easy to get carried away with nuts so I am trying to switch up my baking and use more coconut than nuts like almonds etc.  Yes, I realize that cicinut is classified as a nut but coconut has a better Omega 3:6 ratio and as an added bonus is low oxalate.  These are not low carb but they are also not a cheat.  A treat, absolutely but not a cheat.  The filling recipe came from here.  (I would highly recommend checking out this guys blog.  He has lots of great looking recipes.  And does anyone else think that a man who can cook and bake is totally sexy??)  I created my own base.  The coconut chips I used are from Wilderness Family Naturals.  They are incredible and I did hesitate to use them in a recipe as they are not cheap (when you include shipping into the cost) and I would have been devastated if these didn’t turn out and I wasted all those coconut chips.  In the end it turned out to be well worth it.  So how good were they?  Me, who really does not have a sweet tooth ate probably 80% of the pan over the course of about 36 hours.  So, yes, they were a smashing success.  The kids hated them as expected due to the lemon in them and this suited me fine.   I do believe that I will have to make more of these ASAP, you know for quality control.  🙂  I believe these are GAPS legal and low oxalate as well as soy, corn, dairy, grain, gluten, refined sugar and nut free.  In case you are interested in seeing the evolution of this blog, check out my first recipe for Lemon Bars.

Crust

2 eggs

1/4 cup melted coconut oil (expeller pressed is fine if you don’t want to use your expensive virgin coconut oil)

2 T raw unfiltered honey

pinch of sea salt

1/4 cup coconut flour

1/4 cup coconut chips

1/2 cup coconut chips

Preheat oven to 350.  In a food processor combine eggs, coconut oil, salt and honey.  Mix to combine.  Add coconut flour and 1/4 cup of coconut chips.  Again, process until well combined.  Transfer to a bowl and stir in remaining coconut chips.  Grease a glass Pyrex baking dish with coconut oil.  My dish is 7×11 or 2.2 QT/2 L.   Press cookie batter base evenly into dish.  Bake for 18 minutes at 350 until the edges are just starting to brown and center is cooked through. 

Filling

1 cup freshly squeezed lemon juice (strained so there is no pulp)

6 whole eggs

1/3 – 1/2 cup raw unfiltered honey

1/2 cup coconut oil (I used expeller pressed.)

pinch of sea salt

Whisk lemon juice, eggs, salt and honey together in a large glass bowl or double boiler.  Bring about an inch of water to boil in a medium saucepan or bottom of double boiler.  Set the glass bowl on top of the boiling water.  The water should not be in contact with the bowl.  Slowly whisk in the melted coconut oil.  Continue to whisk as the water remains at a rolling boil.  DO NOT TURN YOUR BACK on this.  Whisk until it starts to thicken.  When it starts to thicken it gets thick FAST.  Remove from heat.  It should be thick enough to coat the back of a spoon.  Strain the filling through a fine mesh to remove any cooked egg bits.  Top the crust  and smooth it out.  Refrigerate.  My husband and The Civilized Caveman both thought this would have been great frozen too.  It probably would although that would have really slowed me down as I polished these all off.  (Hmmm maybe that is a good thing.)  Top with extra coconut chips as you see fit.  Refrigerate (or freeze) until set then devour!

This post was shared at: http://www.thehealthyhomeeconomist.com/monday-mania-1232012/, http://www.realfoodwholehealth.com/2012/01/fresh-bites-friday-january-27-2012/